Additional Fields Configuration
Unizo Unified APIs support customization through category-specific additional fields and custom field mapping. This enables you to define and work with extra fields beyond the predefined common data model, while retaining unified API consistency.
Creating Additional Fields
Step 1: Navigate to Setup Integrations
- Access the Unizo platform
- Navigate to Setup Integrations from the left menu
- Select the Connectors tab
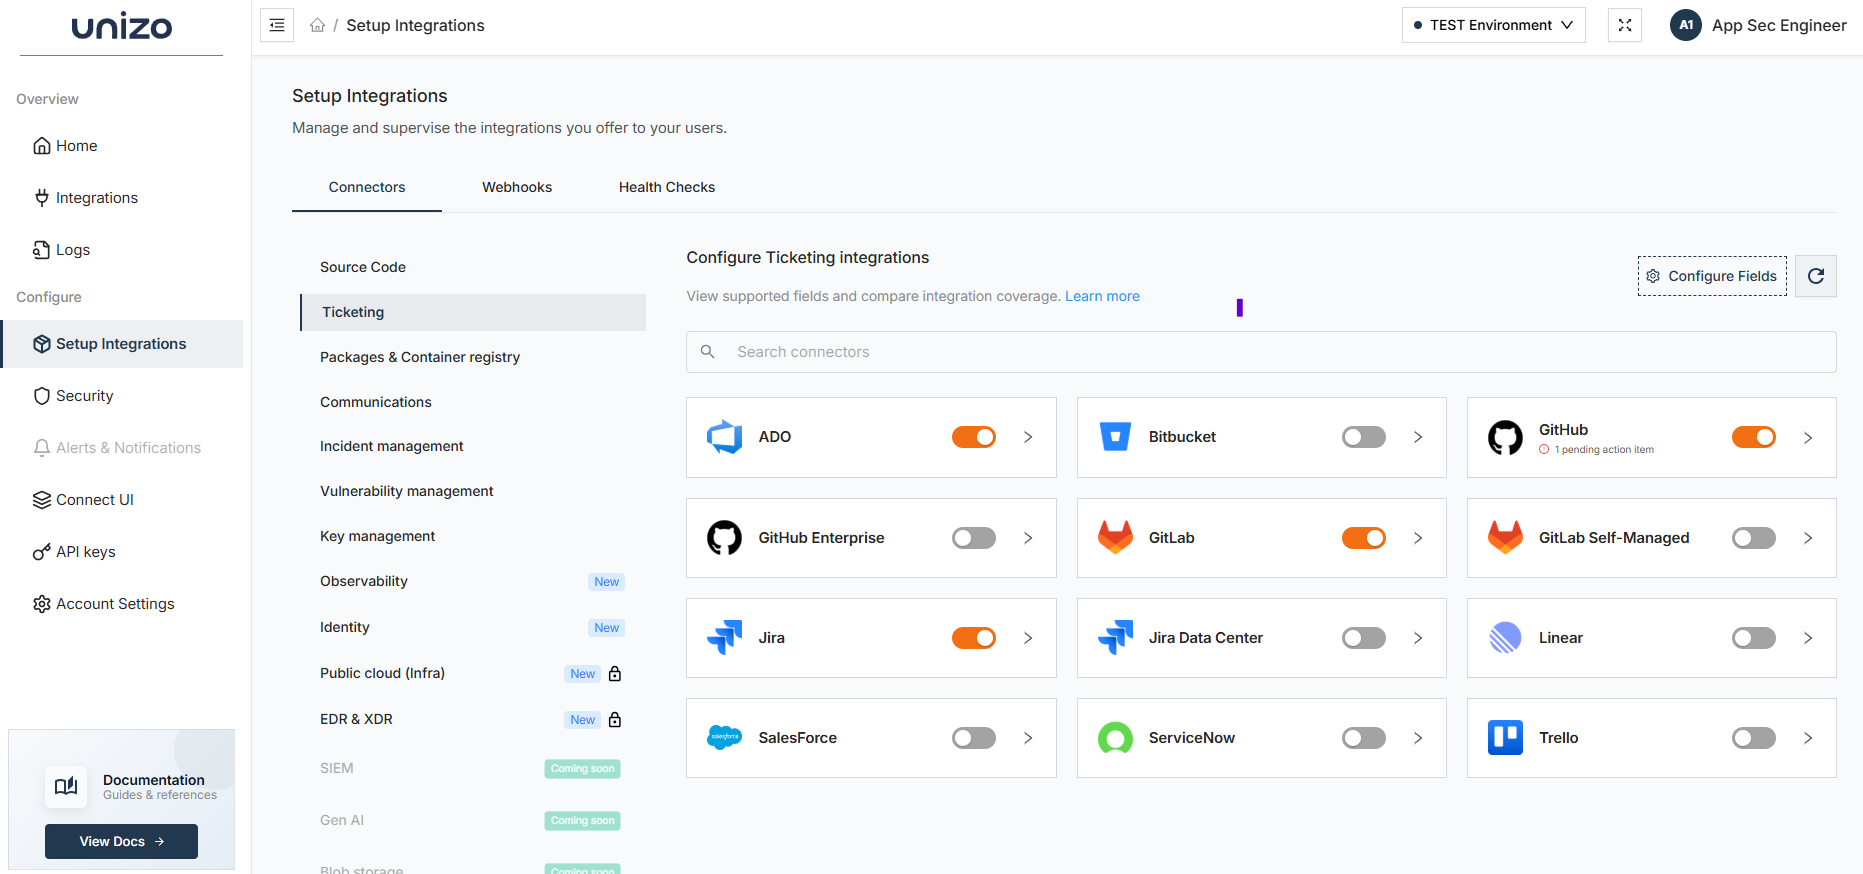
Setup Integrations - Connectors Tab View
Step 2: Configure Additional Fields
- Select Integration Category: Choose the specific integration category (e.g., Source Code, Ticketing, etc.) where you want to add additional fields
- Click Configure Fields: Look for the "Configure Fields" button
- Access Field Configuration: This opens the Configure Fields dialog
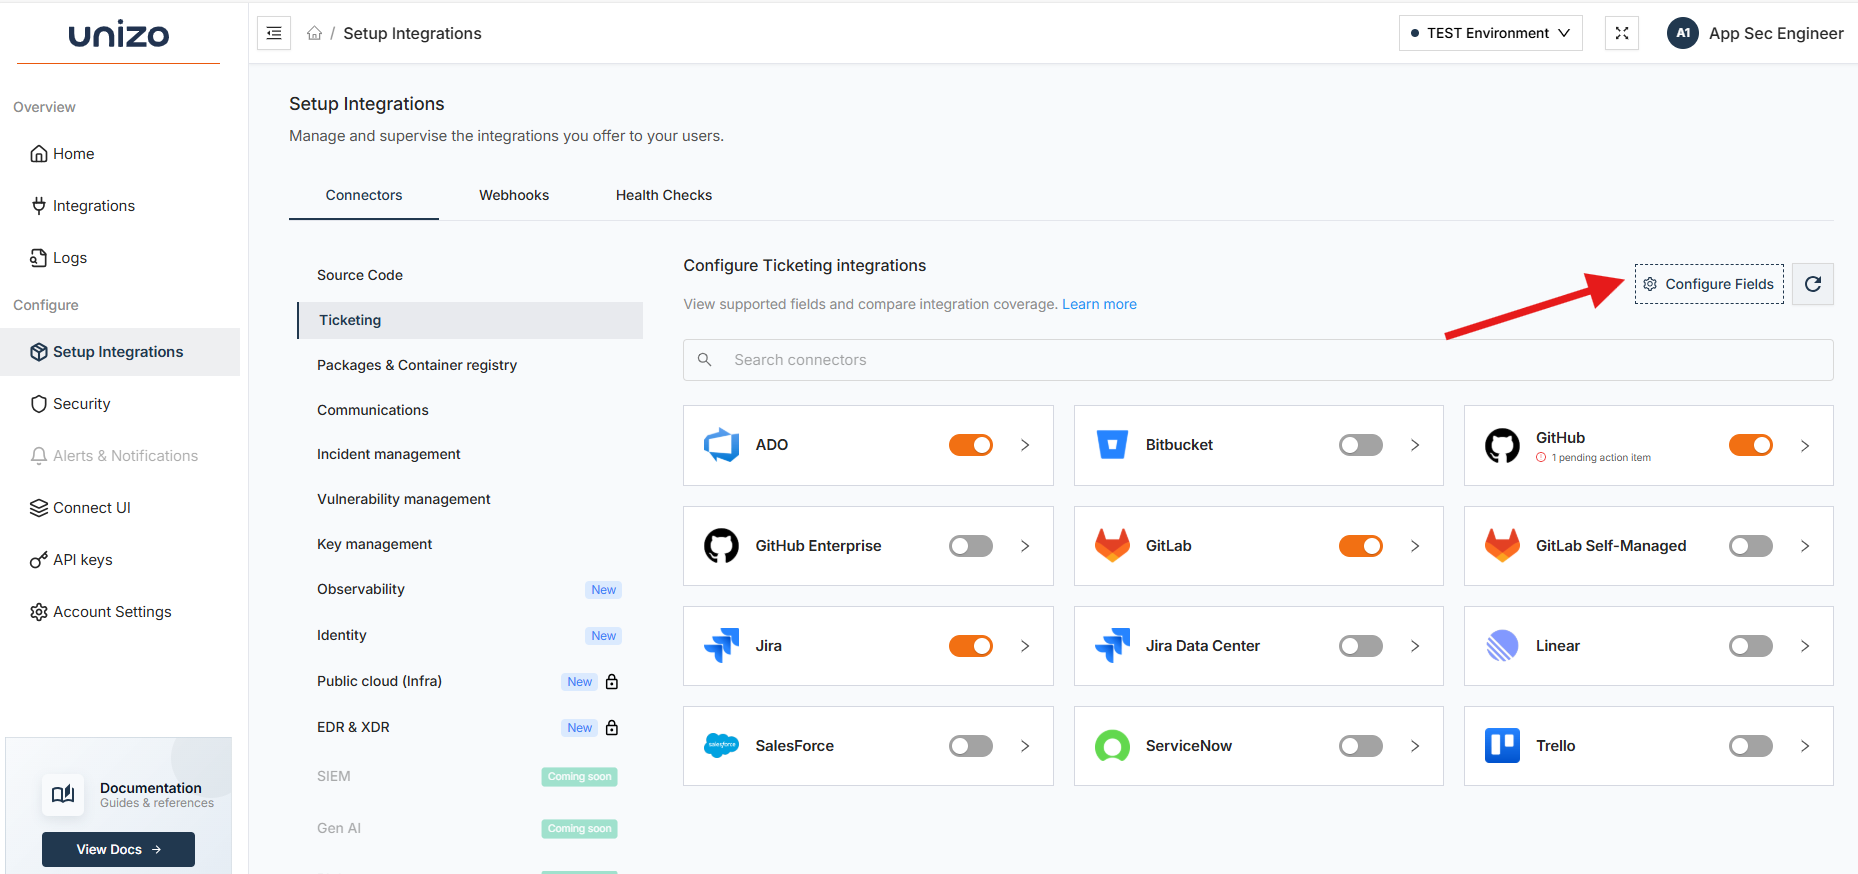
Configure Additional Fields Dialog Interface
Step 3: Add Additional Fields
In the Configure Fields dialog:
- Browse Data Models: Expand the relevant sections (Example : Ticket, User, Comment etc.)
- Review Existing Fields: Each section shows the current number of fields configured
- Add New Fields: Click the "+ Add Field" button next to the desired data model
- Configure Field Properties:
- Field name
- Field type
- Description
- Add Field: Saves your additional field definitions
Adding Custom Fields to Data Models
Mapping Additional Fields
Step 1: Configure Field Mappings
After creating additional fields, you need to map them to source system attributes:
- Navigate to Connector: Go back to the main connectors view
- Select Target Connector: Choose the specific connector (e.g., Jira, ServiceNow, etc.)
- Access Data Types: Click the expand icon next to your connector and select "Data Types"
- Choose Data Types: Select the data model where you want to add field mappings
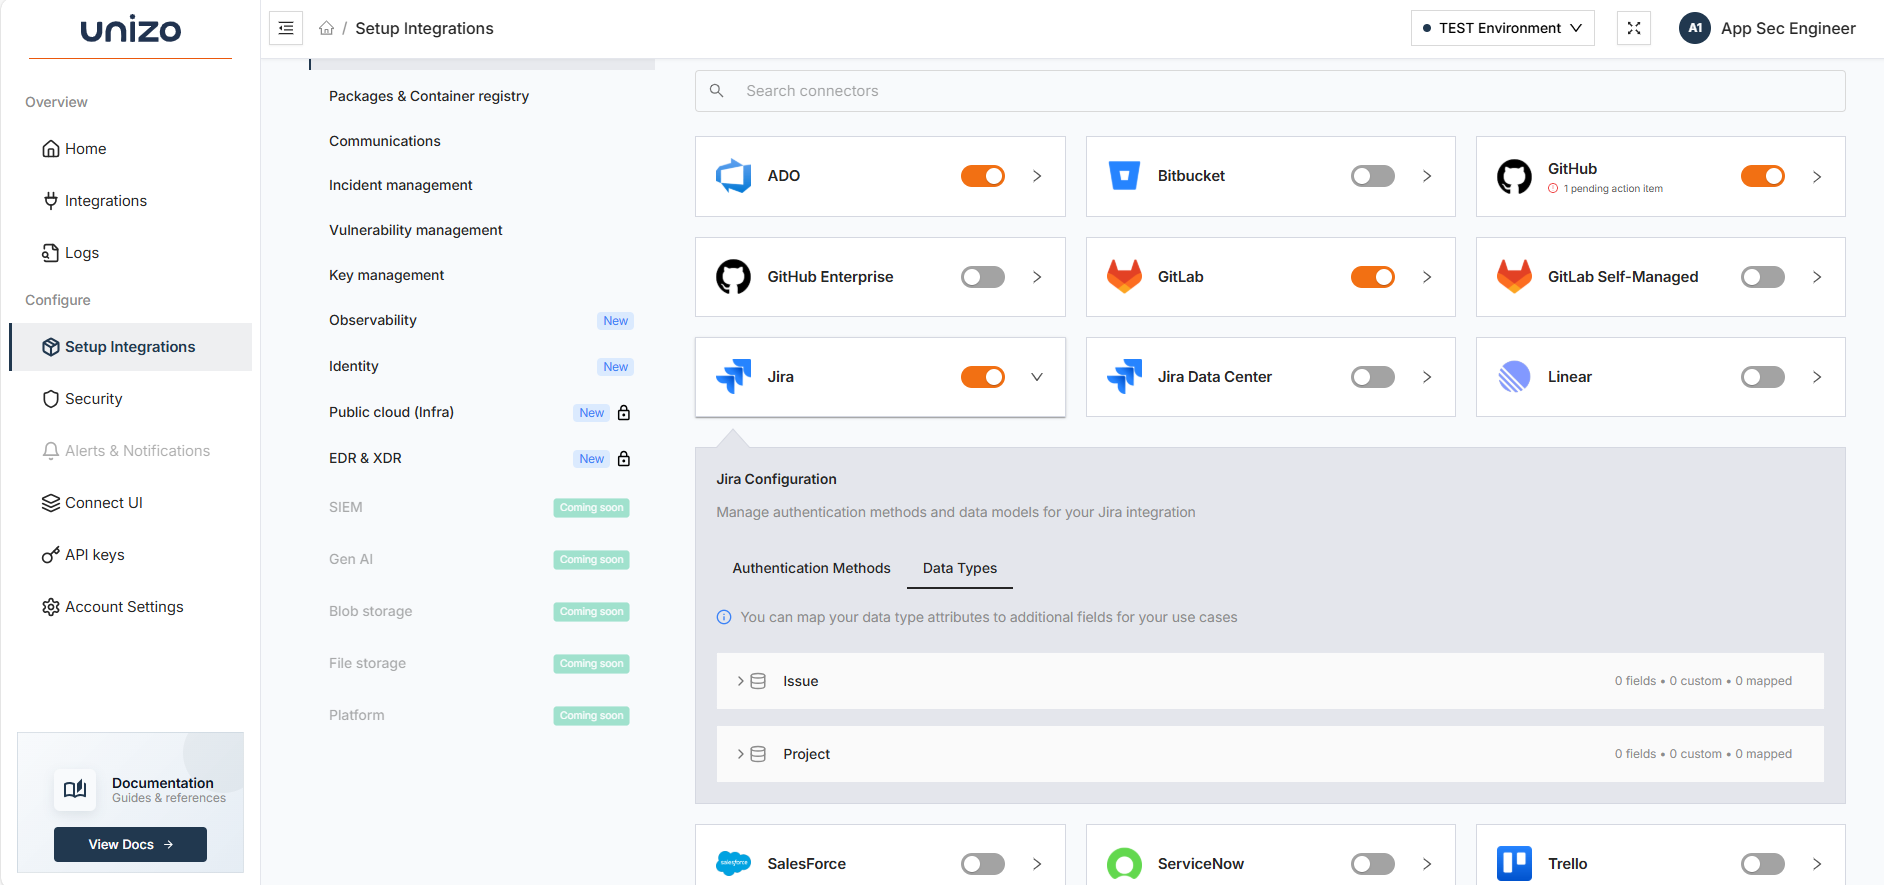
Selecting Data Models for Field Mapping
Step 2: Create Field Mappings
In the Field Mapping interface:
- Add Mapping: Click "Configure" to create a new field mapping
- Select Source Field: Choose the connector's attribute from the "Source Field" dropdown
- Select Target Field: Choose your custom additional field from the "Target Field" dropdown
- Validate Mapping: Ensure the data types are compatible
- Save Mappings: Click "Save Mappings" to apply the configuration
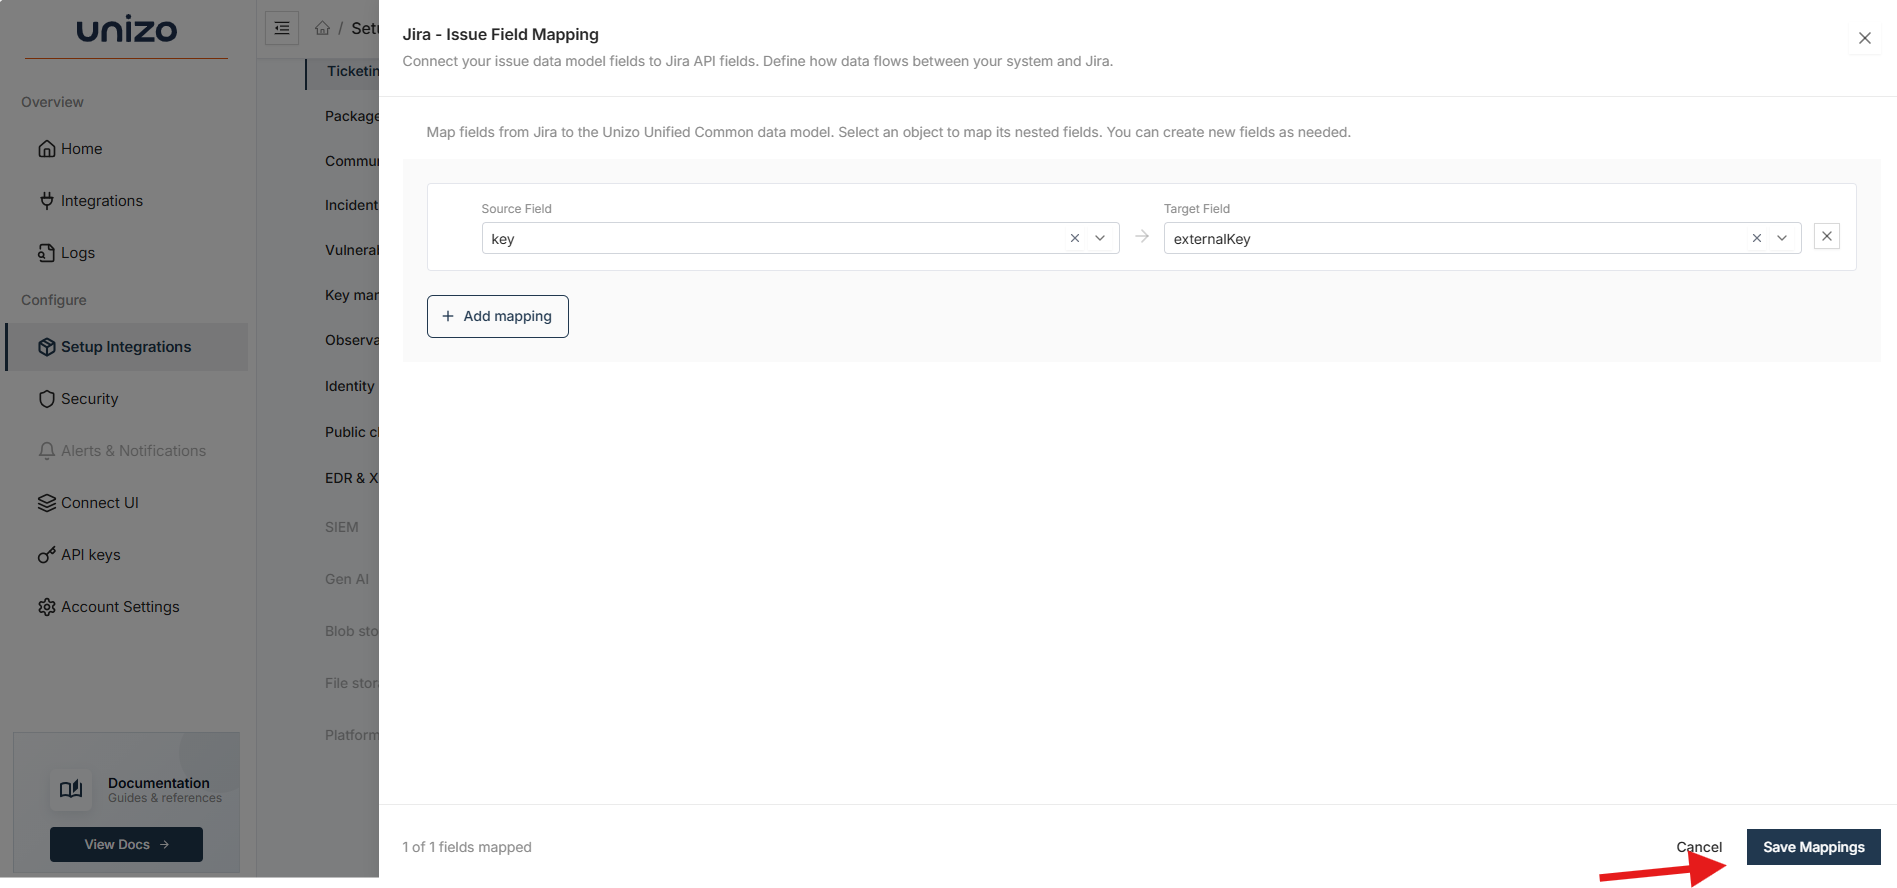
Field Mapping Configuration and Save Interface
Accessing Additional Fields
Access additional field mappings through Unified APIs to retrieve your custom data alongside normalized fields.
API Response
Additional field mapping data is automatically accessible in the API responses returned from Unified APIs. No additional parameters are required - once your field mappings are configured and saved, the custom fields will be included in all relevant API responses.
Below is a sample request to the Ticketing Common Model after mapping is complete:
{
  "data": [
    {
      "id": "10700",
      "key": "IT-68",
      "name": "test123 update",
      "assignees": null,
      "creator": "DemoUser",
      "dueDate": null,
      "status": "To Do",
      "description": "test123 update",
      "priority": "High",
      "type": "Task",
      "targetUrl": "https://duser-jsm9790.atlassian.net/rest/api/2/issue/10700",
      "additionalFields": {
        "externalKey": {
          "key": "IT-68"
        }
      },
      "changeLog": null,
      "native_response": {
        // Raw response from source system
      }
    }
  ]
}
The additional fields are stored in the additionalFields object within the response
and the mapped attributes from your source systems. In this example, the externalKey field has been mapped and is accessible alongside the common model fields.
For additional support, contact our team at support@unizo.ai.