Connect UI
Connect UI provides a fully browser-based interface for integration setup. It enables end users to authenticate and connect to third-party services via a secure, pre-generated URL—without requiring you to build or maintain any frontend components.
Benefits
- Fast proof of concept of Unizo demonstrates the power of integration layer without making frontend changes
- No app login required for your users, they can authorize integrations independently of your app
- Fully customizable with your branding and domain
- Multiple layout options including embedded and pop-up modes
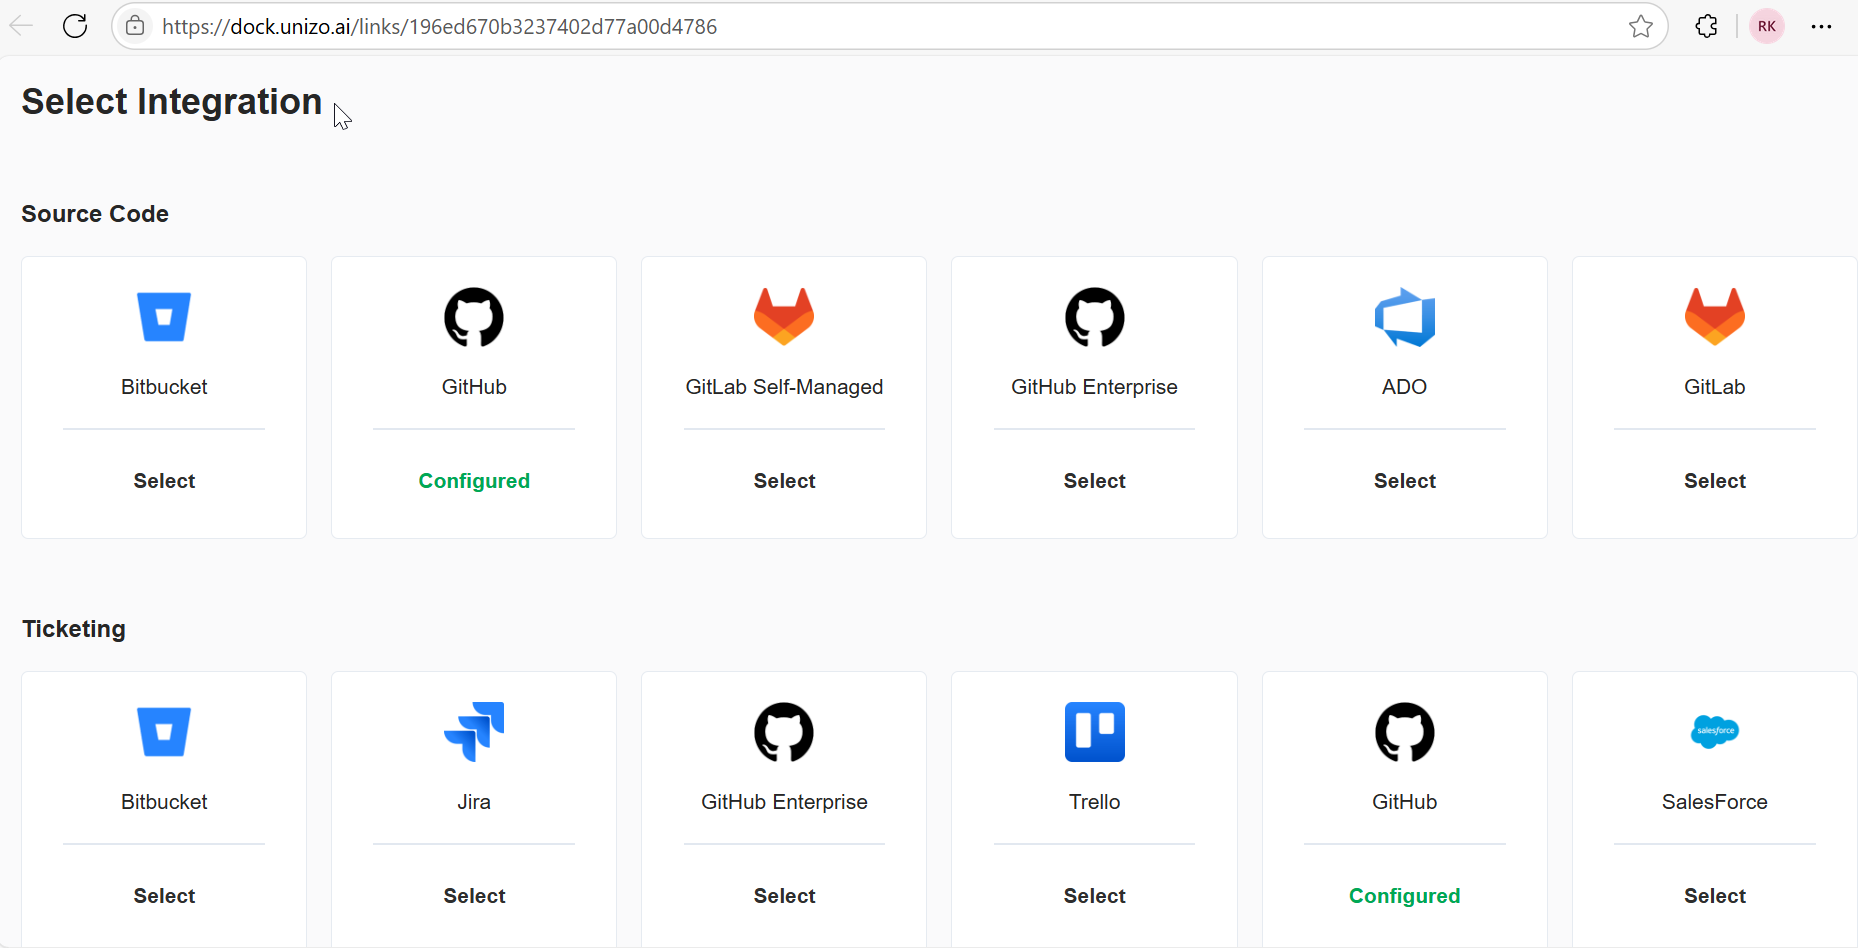
Connect UI drop-in integrations
Configure Connect UI
Configuring Connect UI serves as the foundational step for your Connect UI integration. It acts as a container that holds all the necessary settings and credentials required for your application to communicate with the Connect UI service.
How to Configure Connect UI
-
Navigate to the Connect UI Section from Unizo Console
-
Click the New Connect UI button
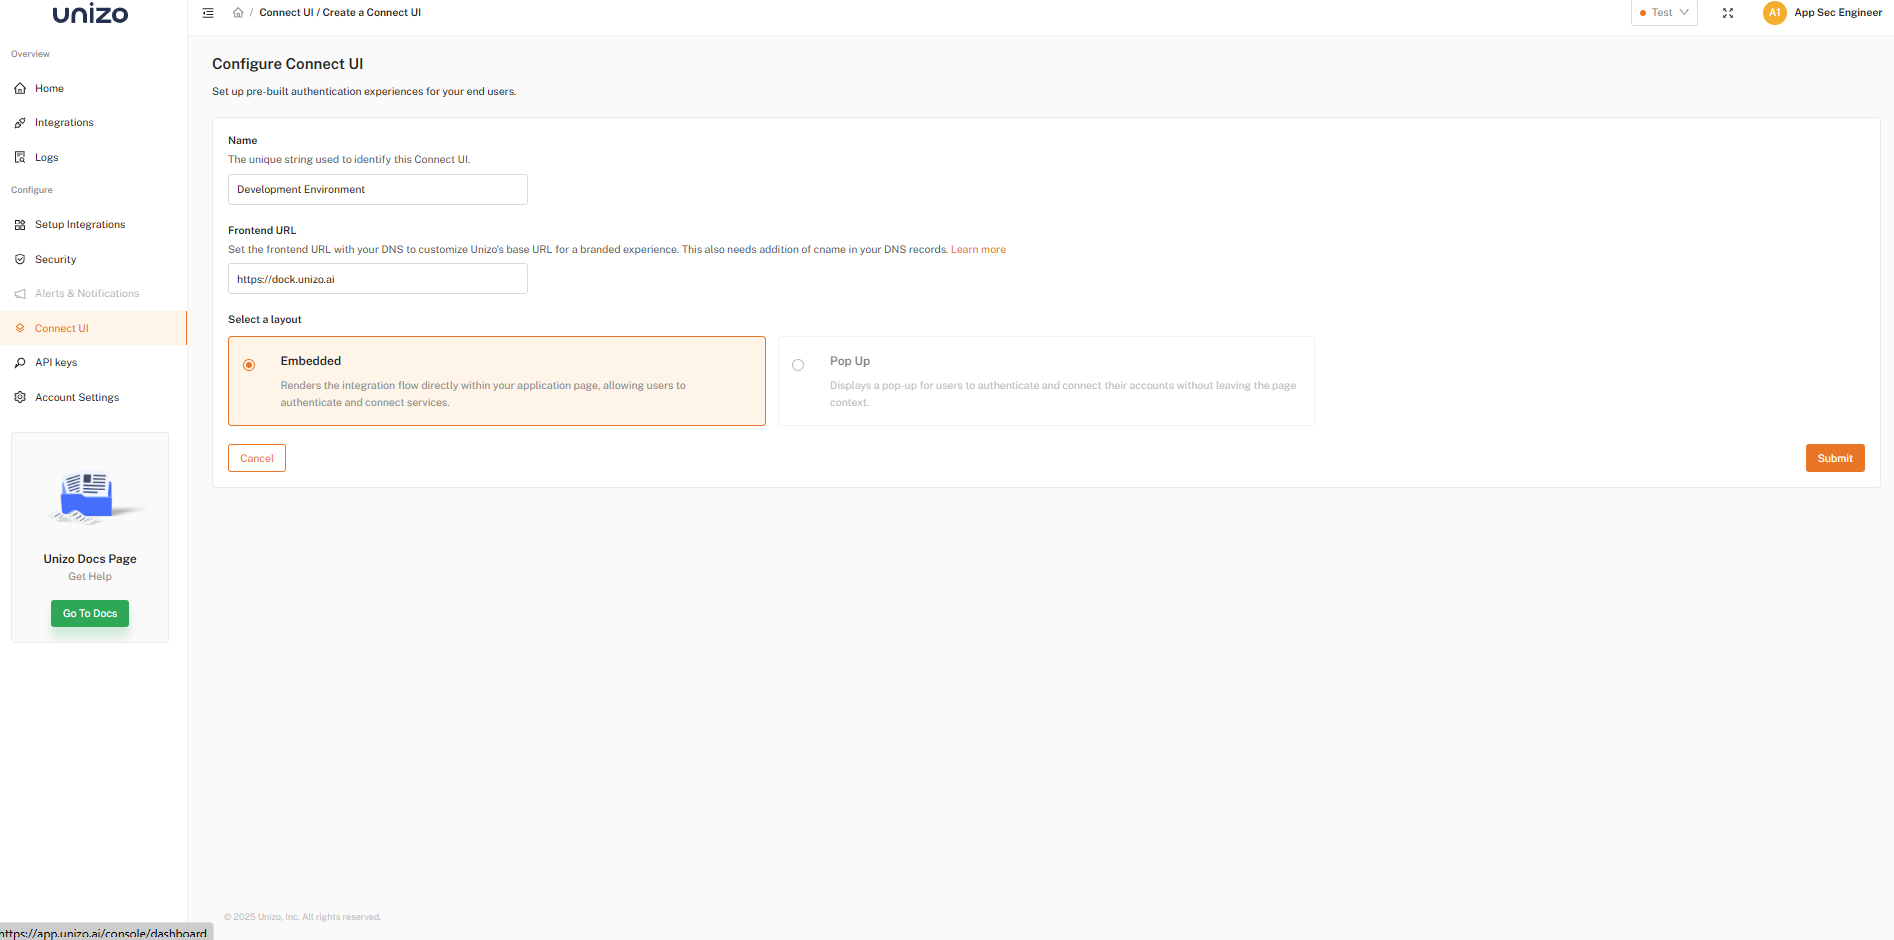
Configure Connect UI
-
Configure Settings
- Instance Name: Enter a descriptive name to identify this Connect UI (e.g., "App Sec UI")
- Enable Custom Domain: Configure your DNS to map a custom URL to Unizo’s platform. By doing so, you replace the default Unizo base URL (https://dock.unizo.ai) with your branded domain, giving your customers a fully white-labeled experience when accessing the Connect UI workflows.
-
Layout: Choose between:
- Embedded – Renders inside your app page
- Pop-up – Displays a modal without leaving the page
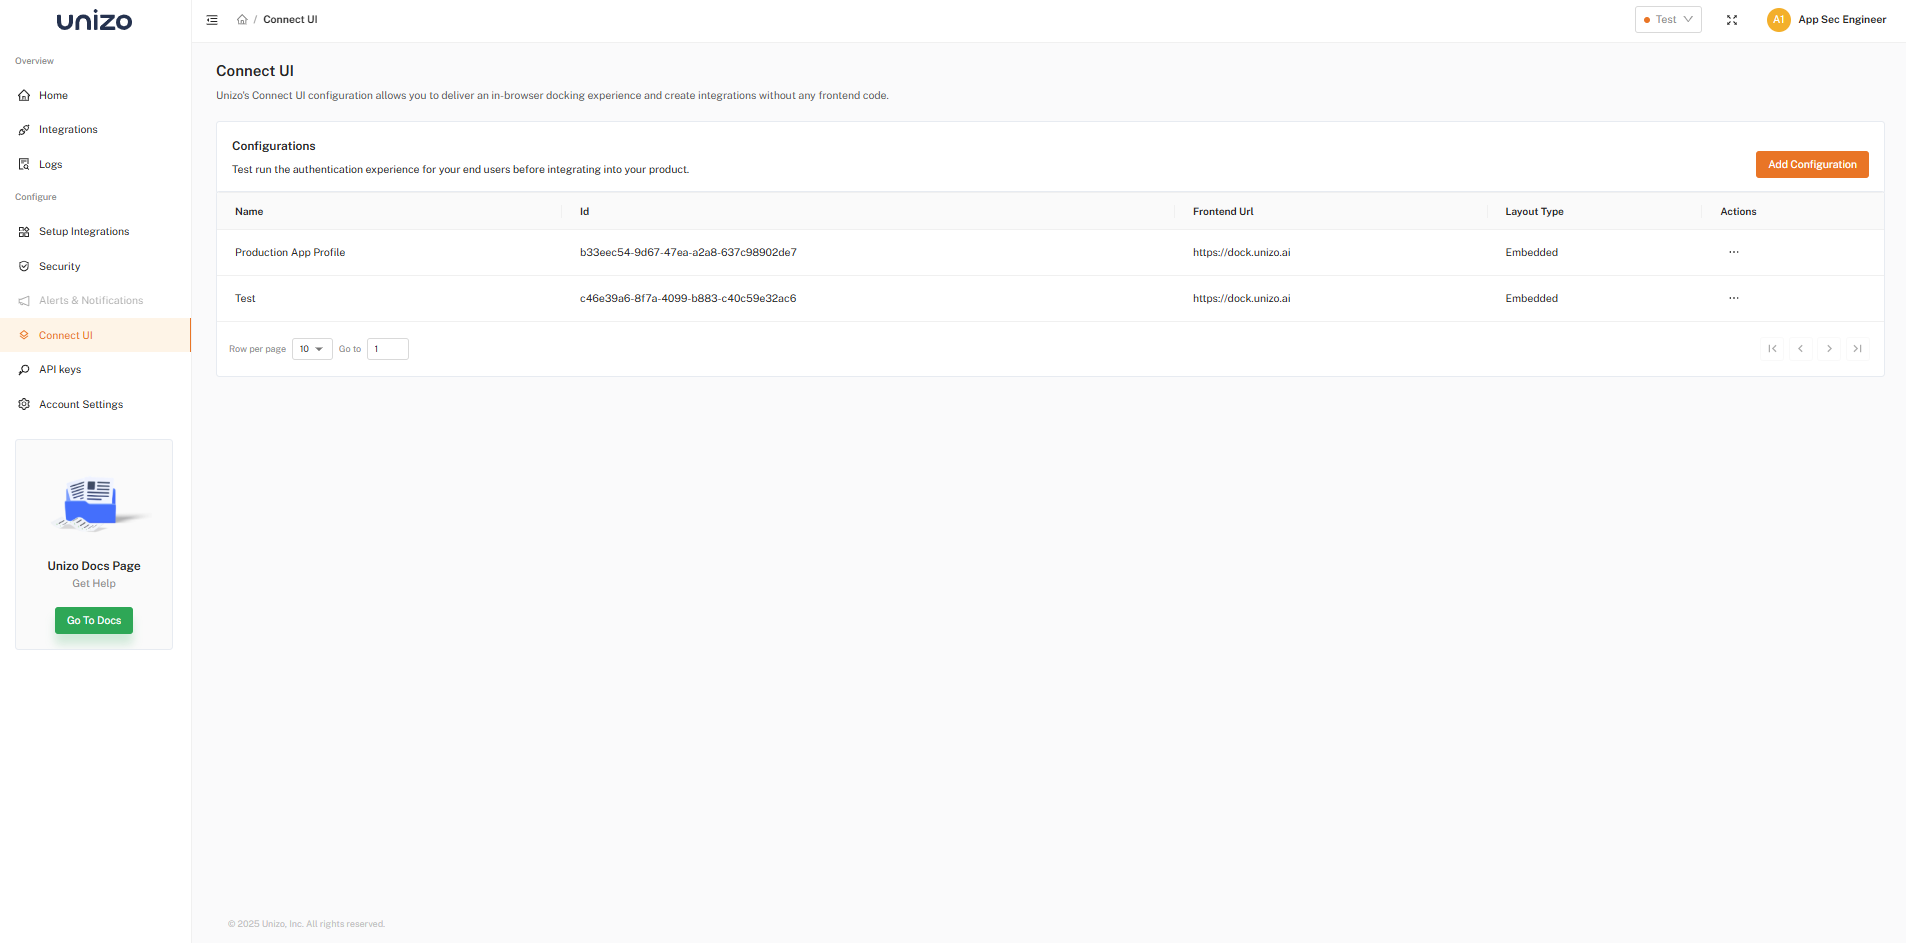
Create Connect UI
- Choose the created connect UI and select Test Run from Actions
You will be presented with a unique URL that can be used to test the authentication experience before integrating into your product.
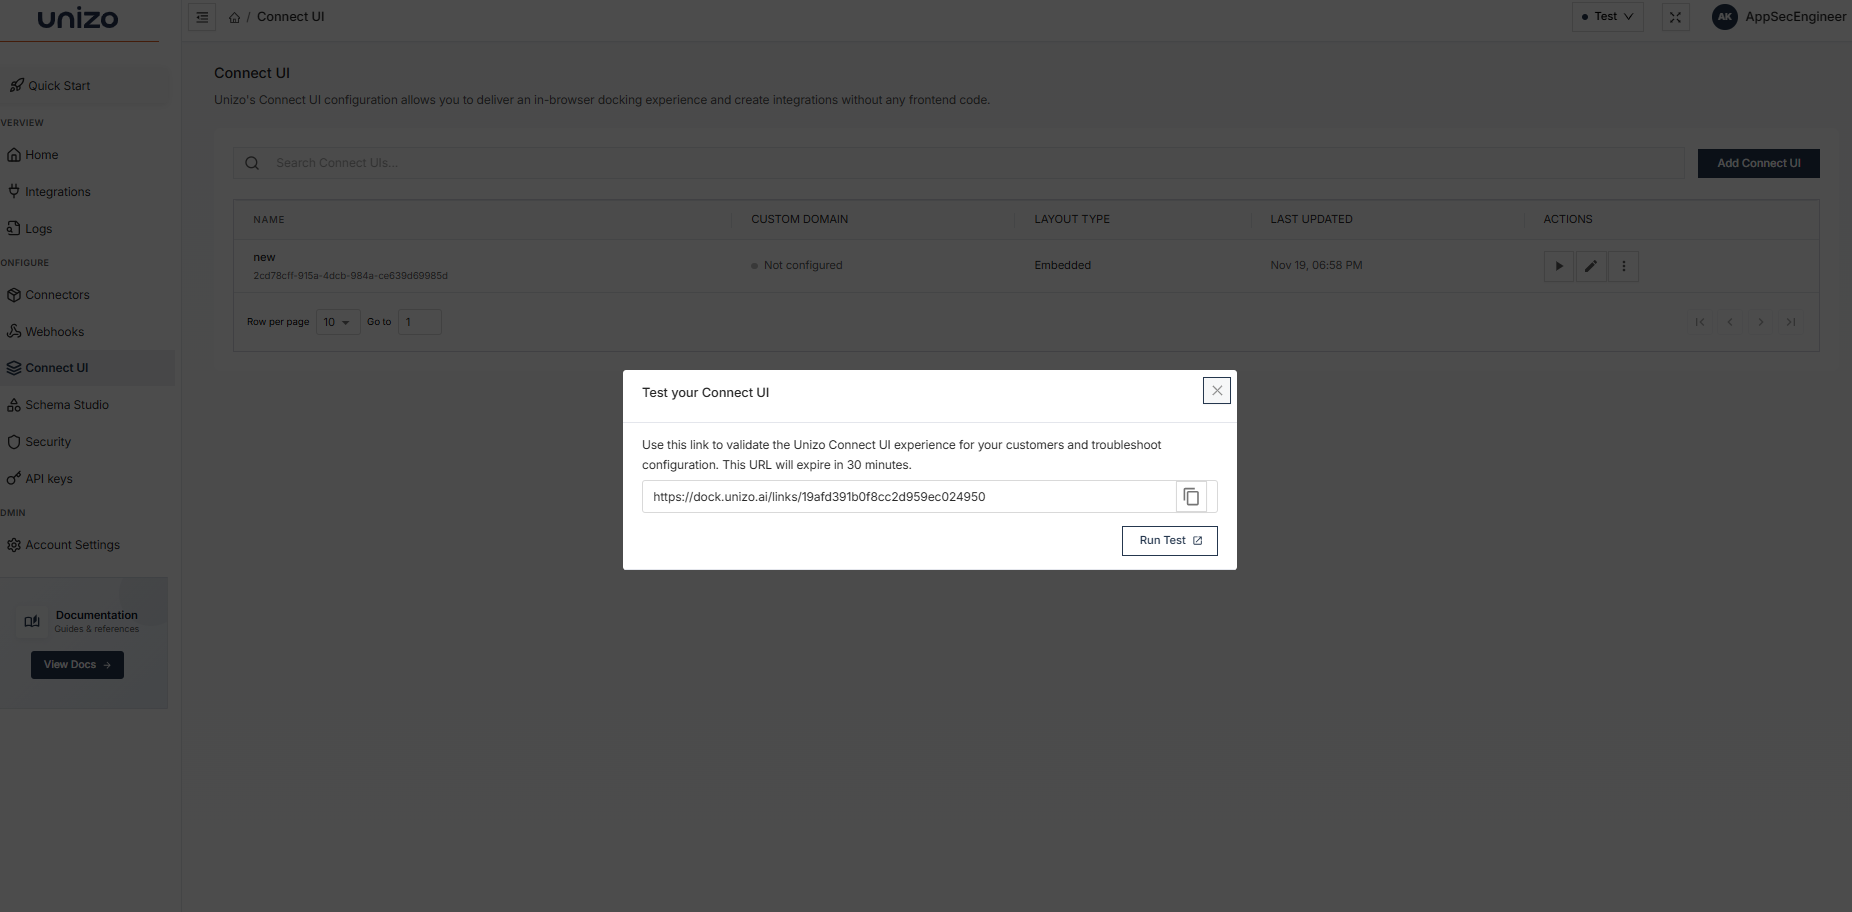
Test run from Connect UI
Note: The URL will expire within 30 minutes
OAuth Scope Configuration
For connectors that use OAuth-based authentication (e.g., Google Drive, OneDrive, Dropbox), you can configure which OAuth scopes are requested during user authorization. This gives you fine-grained control over the permissions your integration requests — choose between read-only access, full access, or any combination that fits your use case.
Scopes are configured in the Unizo Console and are shown to users in the Connect UI before they authorize.
Configuring Scopes
- Navigate to the Connectors page in the Unizo Console and click the connector's service card
- In the configuration panel, locate the OAuth Flow section and click Edit
- Enter your OAuth credentials (Client ID, Client Secret, and Redirect URL)
- Expand the OAuth Scopes section to configure which permissions your integration will request
- Toggle on the scopes your integration needs — each scope shows its access level (READ or WRITE) and whether it requires additional provider verification
Available Scopes (Google Drive Example)
The following scopes are available for Google Drive. Other OAuth connectors have their own scope sets configured similarly.
| Scope | Access | Description |
|---|---|---|
| File Metadata Only | READ | View file metadata (name, size, type) without accessing file content |
| Read-only File Access | READ | View and download all files in Google Drive |
| Full Drive Access | WRITE | View, edit, create, and delete all files in Google Drive |
| App-created Files Only | WRITE | Access only files created or opened by this application (narrowest scope) |
| File Metadata Read/Write | WRITE | View and manage file metadata without accessing file content |
| App Configuration Data | WRITE | View and manage the application's own configuration data stored in Google Drive |
Select the minimum scopes your integration needs. For a read-only file explorer, File Metadata Only is sufficient. For downloading files, enable Read-only File Access. Only enable Full Drive Access if your application needs to create, edit, or delete files.
User Experience
When a user connects through the Connect UI, they are shown the selected scopes before authorizing. The scopes step displays the permissions your integration will request, giving the user full transparency before they proceed to the provider's OAuth consent screen.
Users can review the permissions and click Continue to proceed to the provider's authorization, or Cancel to dismiss.
Skipping the Scopes Step
If you want to skip the scopes consent step in the Connect UI and take the user directly to the provider's authorization screen, use the flowConfig.scopesStep.skip setting in the iframe configuration:
var config = {
  flowConfig: {
    scopesStep: {
      skip: true
    }
  }
};

var theme = encodeURIComponent(JSON.stringify(config));
iframe.src = baseUrl + '?theme=' + theme;
You can combine scopesStep with other flow configuration options:
var config = {
  flowConfig: {
    scopesStep: {
      skip: true          // Skip the scopes consent step
    },
    attentionInfo: {
      skip: false         // Still show the admin role step
    }
  }
};

var theme = encodeURIComponent(JSON.stringify(config));
iframe.src = baseUrl + '?theme=' + theme;
| Setting | Behavior |
|---|---|
scopesStep.skip: false (default) | User sees the scopes consent step before authorization |
scopesStep.skip: true | Scopes step is bypassed; user goes directly to the provider's OAuth authorization screen |
Skipping the scopes step does not change which scopes are requested — it only skips the informational screen in the Connect UI. The scopes configured in the dashboard are always sent to the provider's OAuth consent screen regardless of this setting.
For additional support, contact our team at [email protected].