Account Setup Guide
This guide walks you through setting up your account, select, configure and active connector, configure webhook callback URL and preparing your environment for integration development. Lets get started!
Step 1: Create Your Account
Go to https://app.unizo.ai/sign-up and fill in your information:
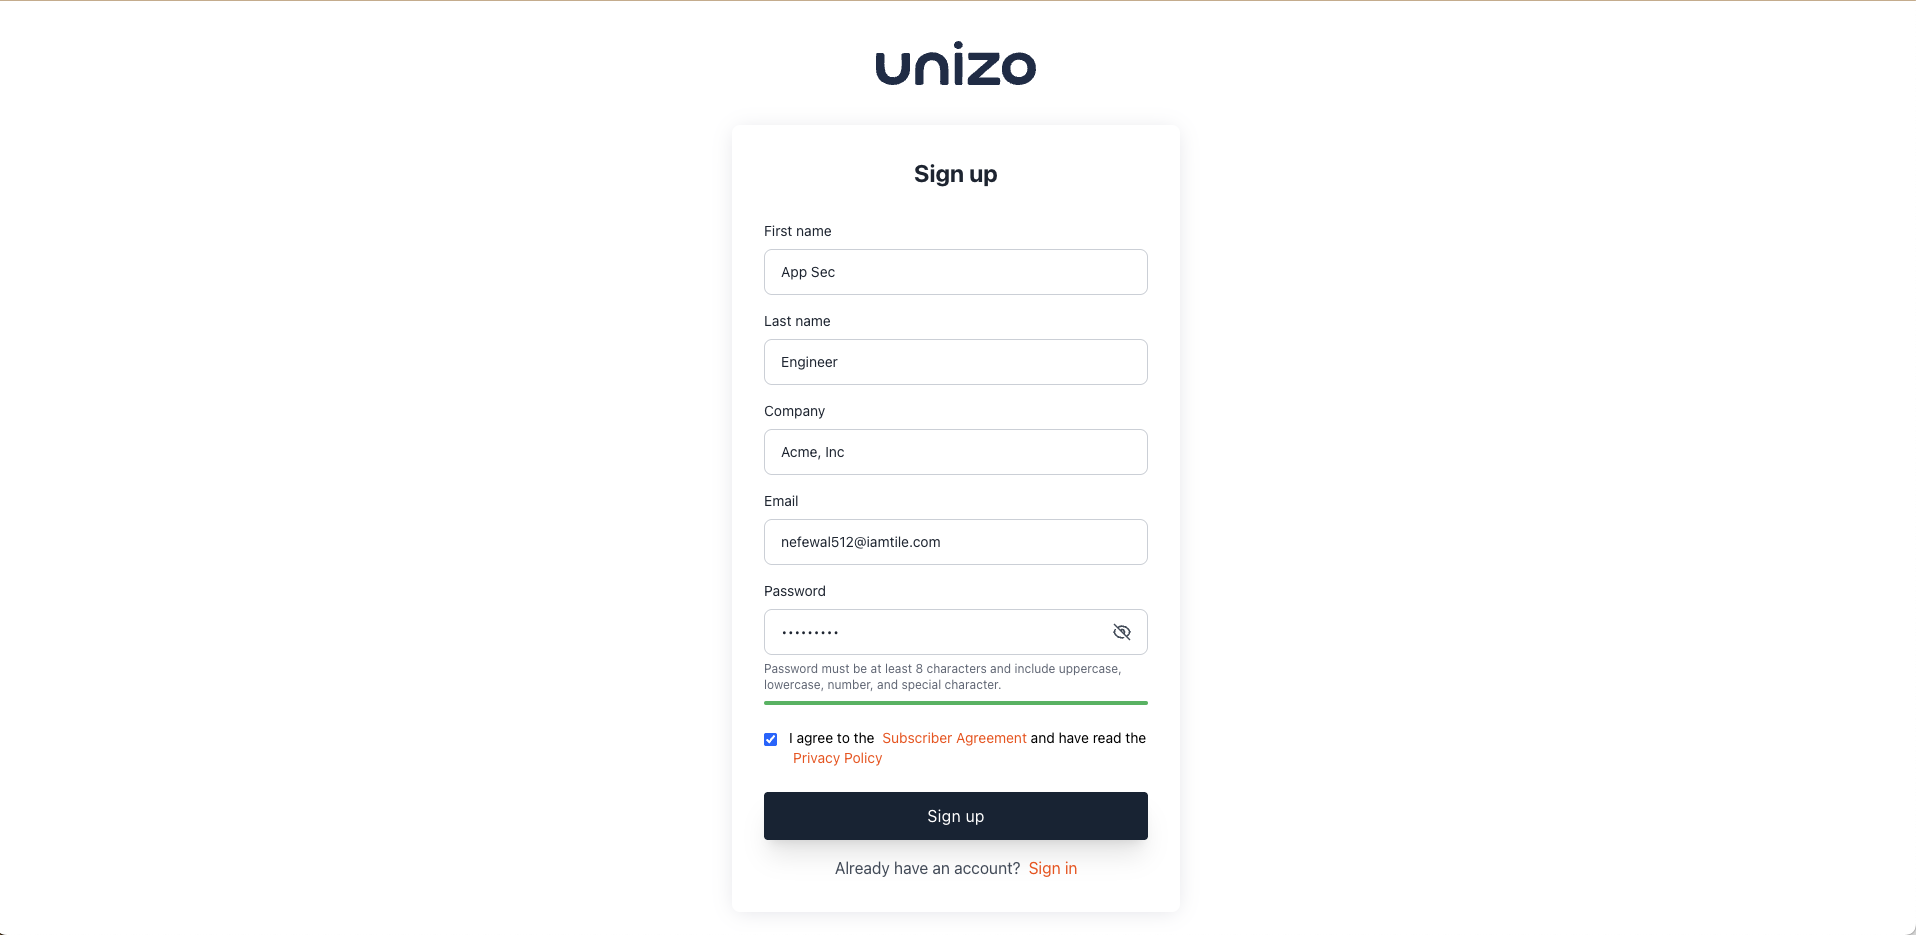
Fill in your details to create your Unizo account
Required Information:
- First Name
- Last Name
- Company Name
- Email Address
- Password (min 8 characters, must include uppercase, lowercase, number, and special character)
Unizo offers a special startup program with exclusive benefits. If you're building a startup, consider applying at https://app.unizo.ai/startup-signup for enhanced features and support.
Step 2: Email Verification
After signing up, you'll need to verify your email:
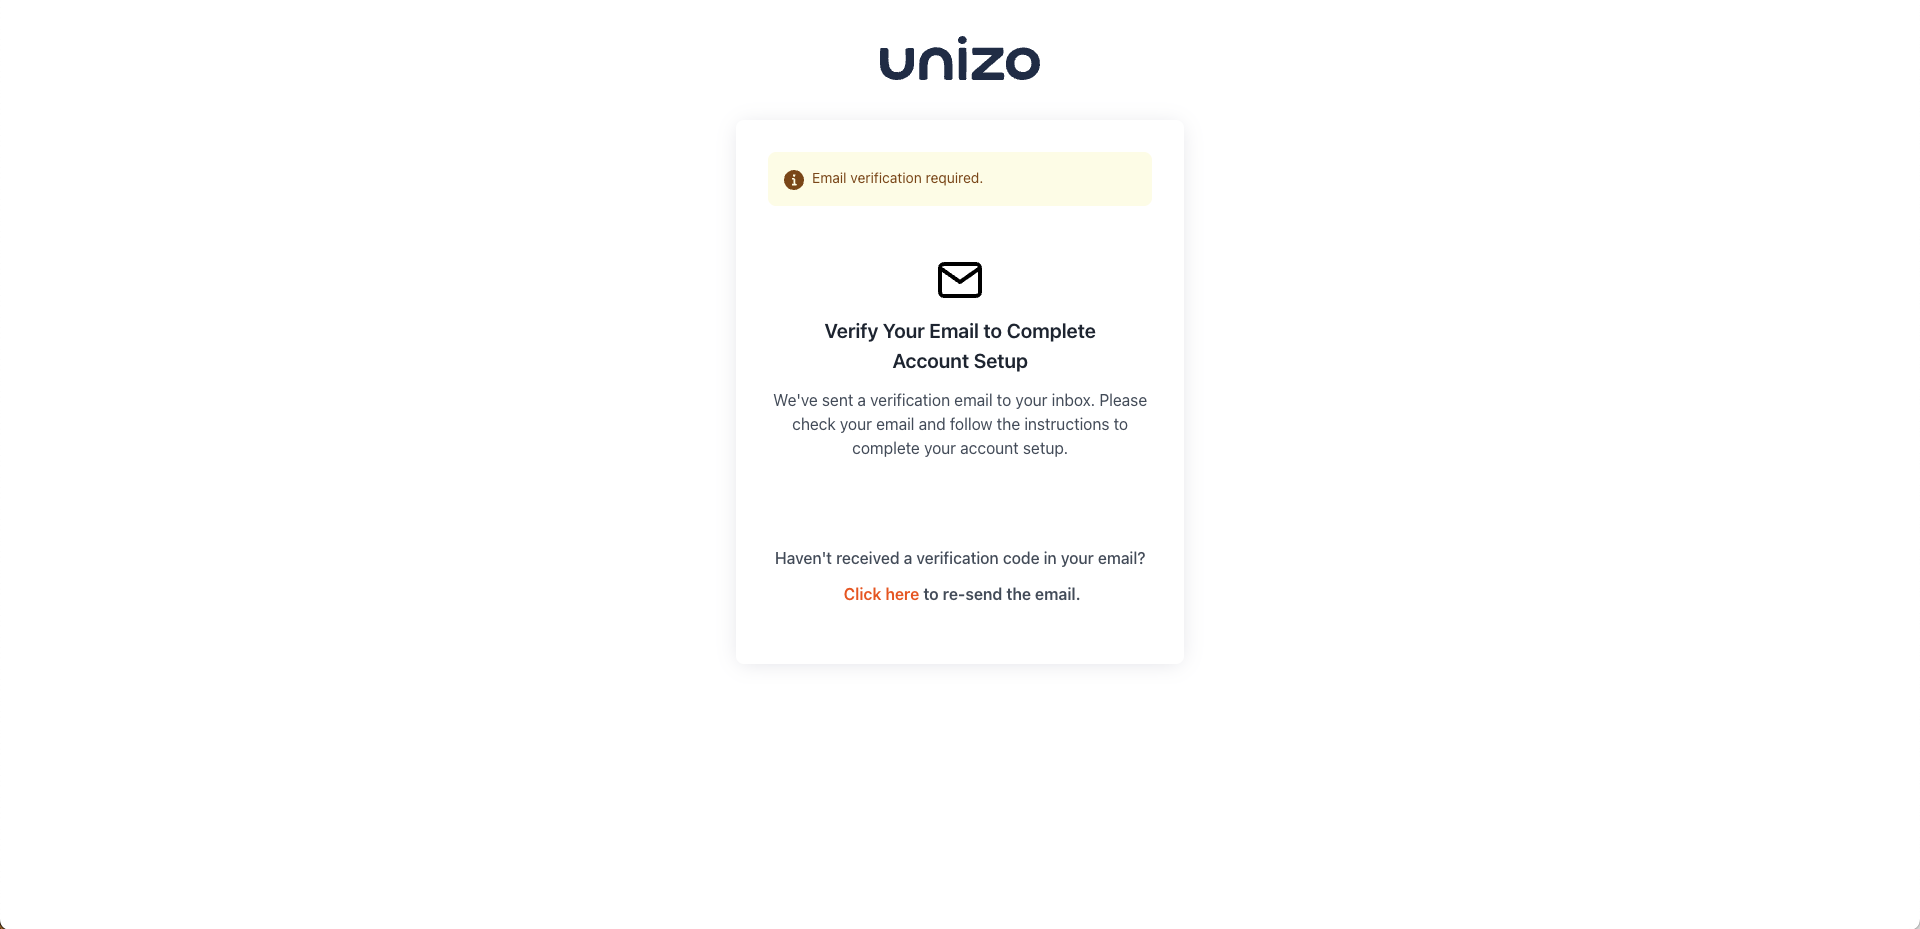
Check your inbox for the verification email
- Check your inbox for the verification email
- Click the verification link
- If you don't receive it, click "Click here" to resend
- Link expires after 24 hours

Account creation in progress
Guided Onboarding Process
You can skip any of these onboarding steps and complete them later from your dashboard. Look for the "Skip" button on each step or access the setup wizard anytime from the console menu.
Step 3: Welcome Screen
After email verification, you'll see the welcome screen:

Click "Get Started" to begin the guided setup
Step 4: Choose Integration Categories
Select up to 3 integration categories for your free tier:

Select the categories that best match your needs
Available Categories:
- Source Code (GitHub, GitLab, Bitbucket)
- Ticketing (Jira, ServiceNow, SalesForce)
- Packages & Container Registry (Jfrog, Docker, AWS)
- Communications (Slack, Teams, Google )
- Incident Management (PagerDuty, Opsgenie)
- Vulnerability Management (Black Duck SCA, Semgrep, Tennable Nessus)
- Observability (Datadog, New Relic)
- Identity (Okta, Auth0)
- And more...
Don't worry - you can always request an upgrade to access more categories in the future.
Step 5: Select Integration Providers
Choose specific providers within your selected categories:
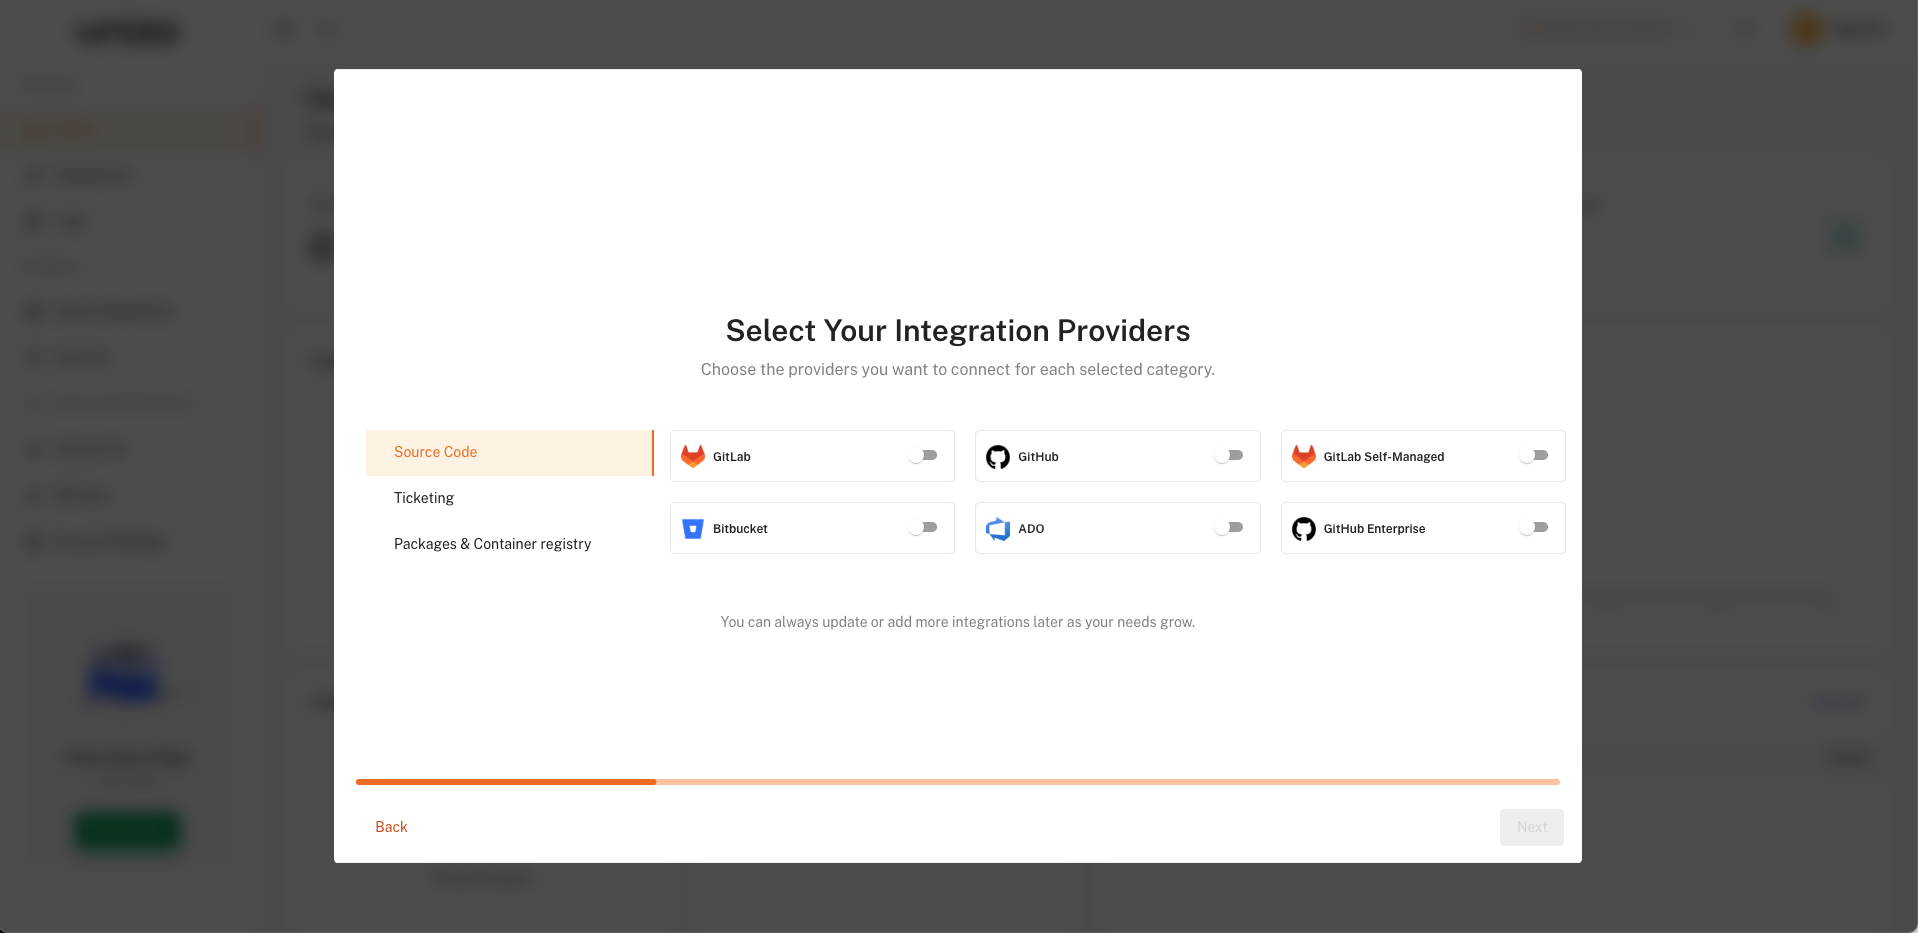
Enable the specific providers you want to connect
- Toggle on the providers you plan to use
- You can add or remove providers later
- Each provider shows available variants (Cloud, Self-Managed, Enterprise)
Step 6: Configure Webhooks (Optional)
Set up webhook endpoints for real-time notifications:
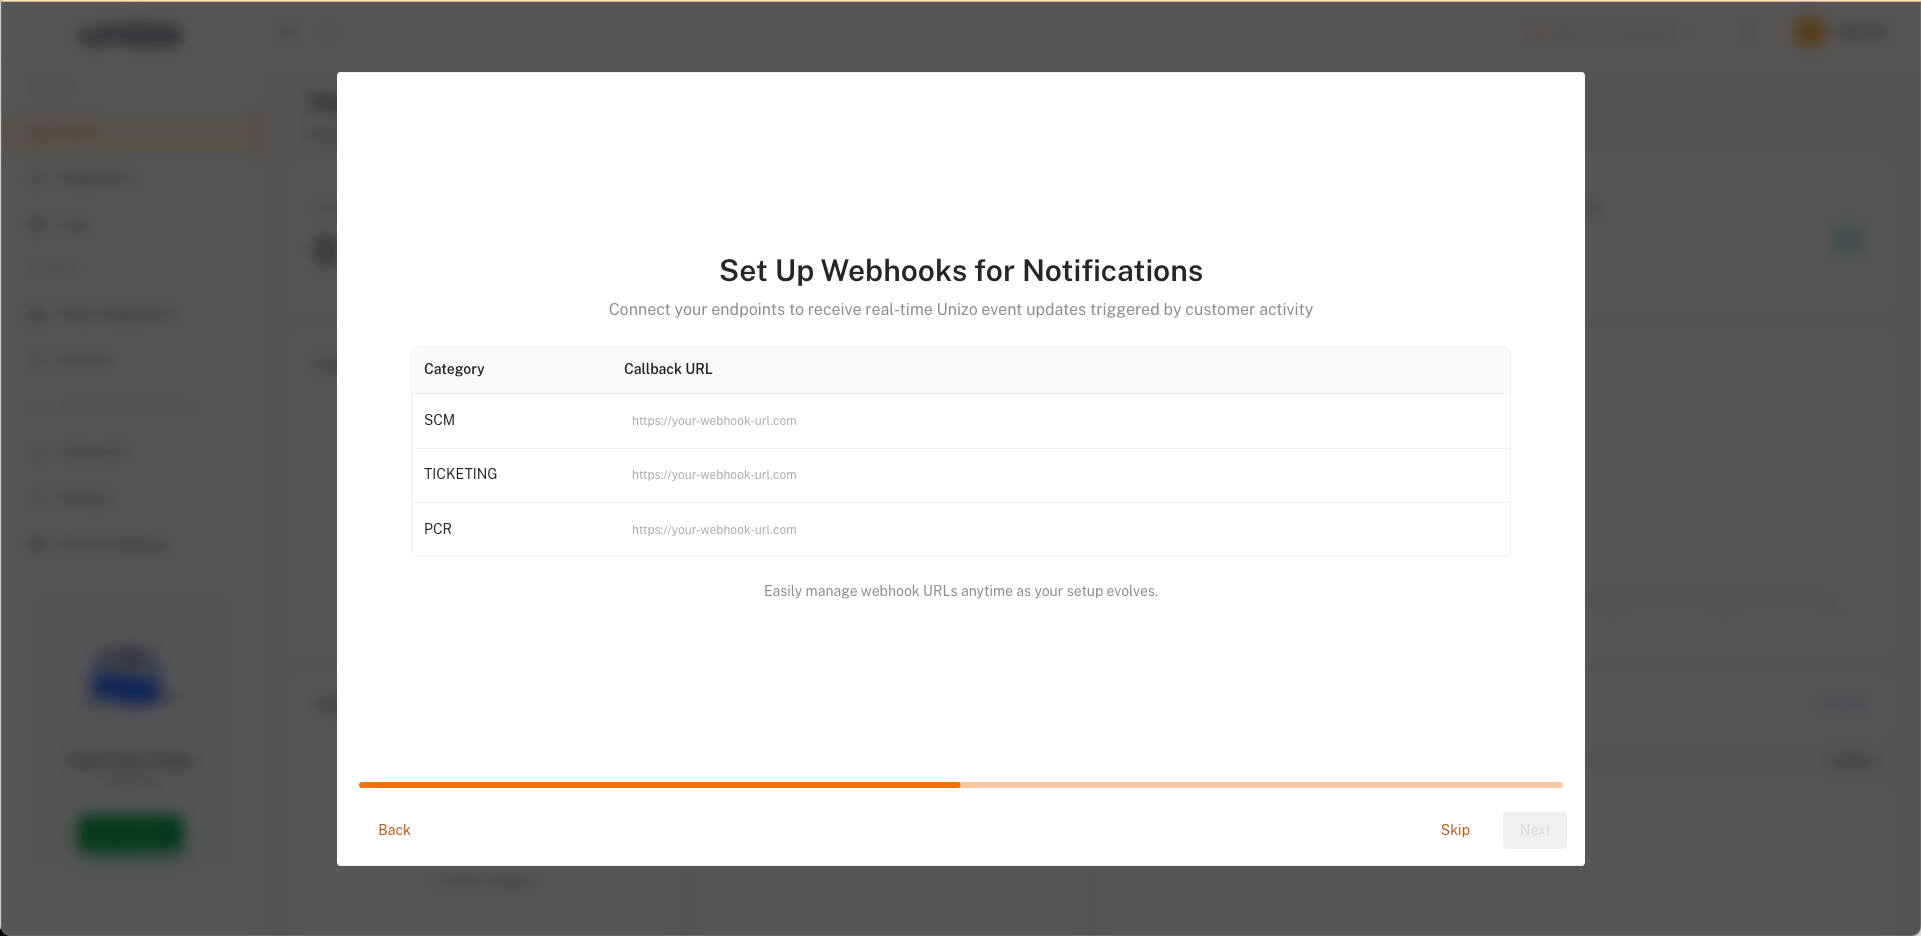
Configure webhook URLs for each category (can skip and add later)
- Enter webhook URLs for categories you want to receive events from
- Green checkmark indicates a valid URL
- You can easily manage webhooks later from the console
For local development, use tools like ngrok to create publicly accessible URLs for your webhooks.
Step 7: Invite Team Members (Optional)
Add your team to collaborate:
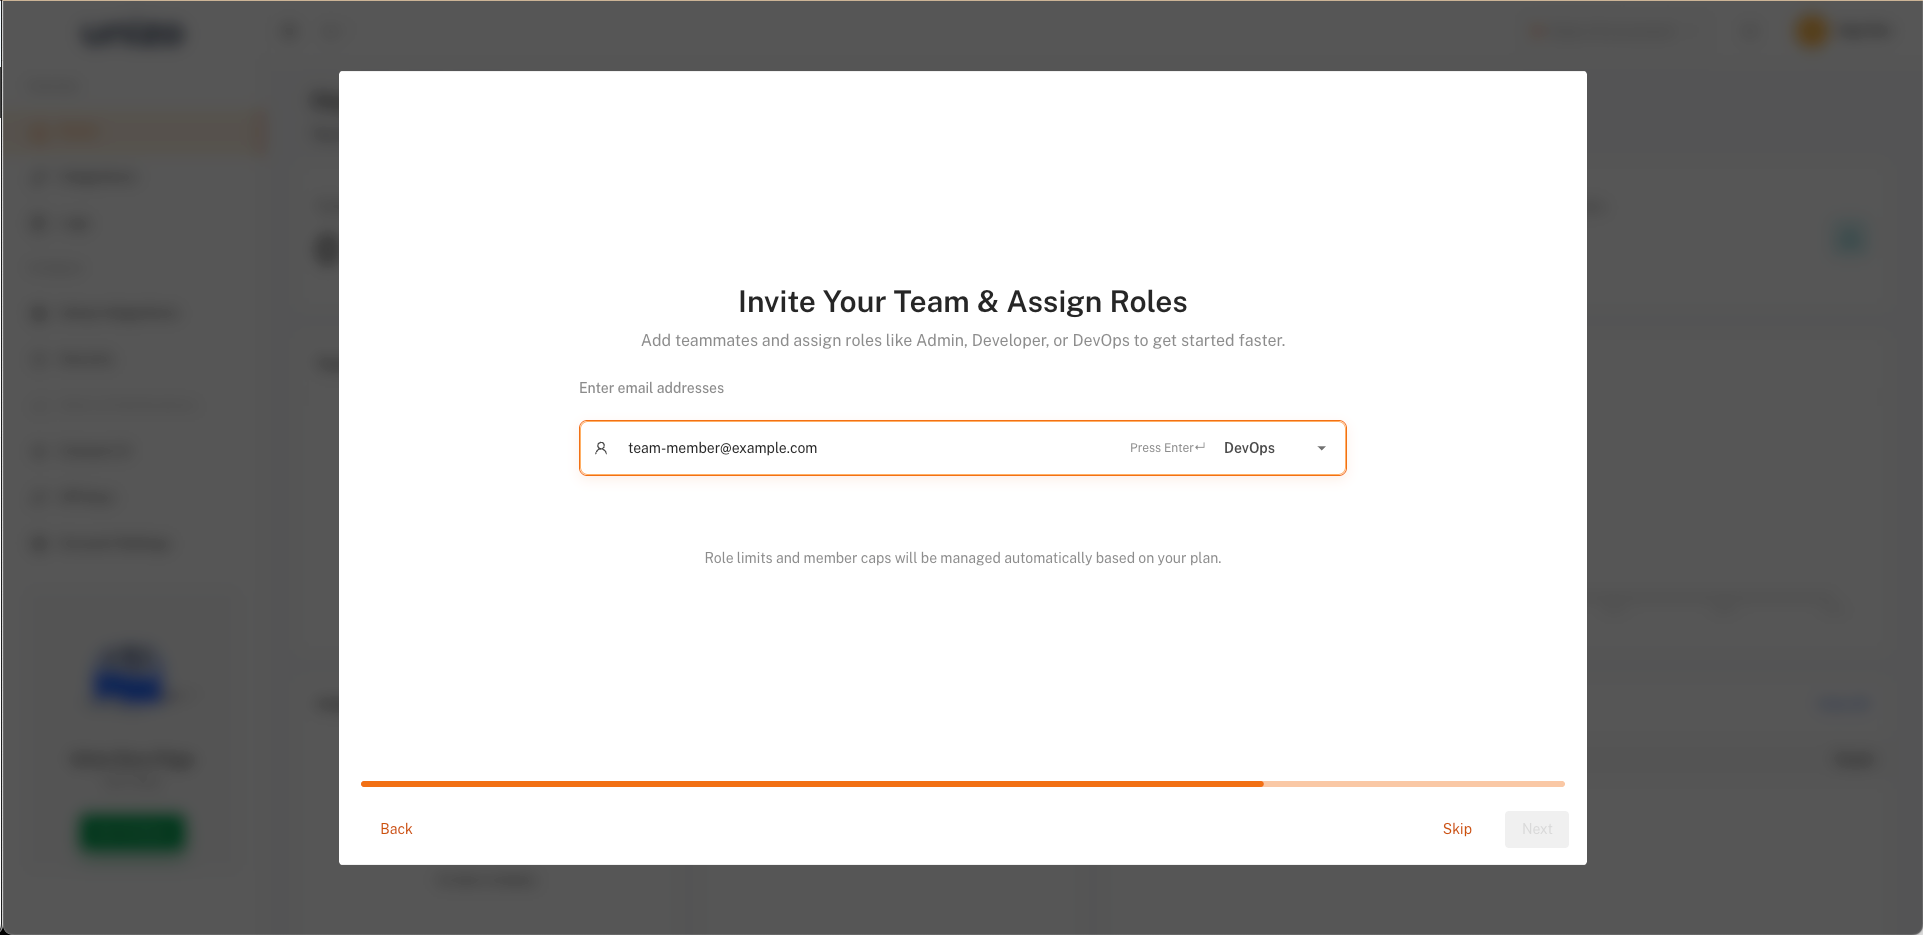
Invite teammates and assign appropriate roles
Available Roles:
- OrgAdmin: Full access to all features
- DevOps: Access to integrations and development features
- Observer: Read-only access for monitoring
Step 8: Setup Complete!
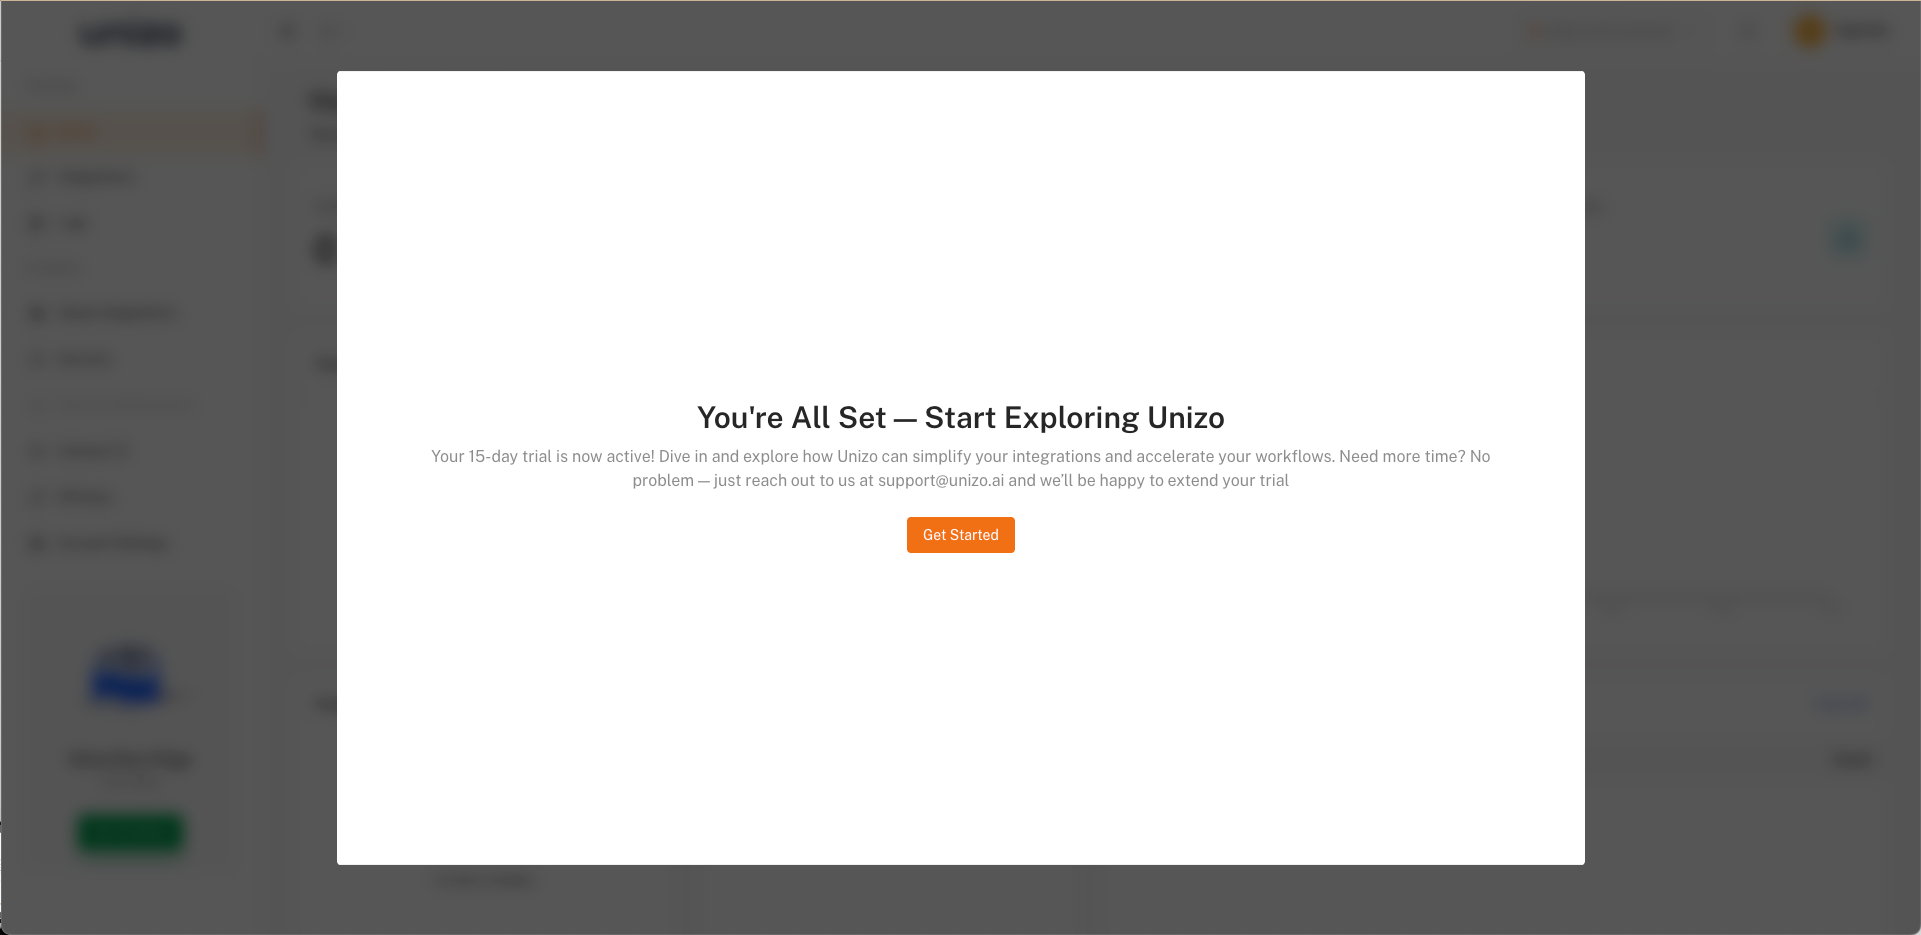
Your 15-day trial is now active
Your Dashboard
After setup, you'll land on your dashboard:
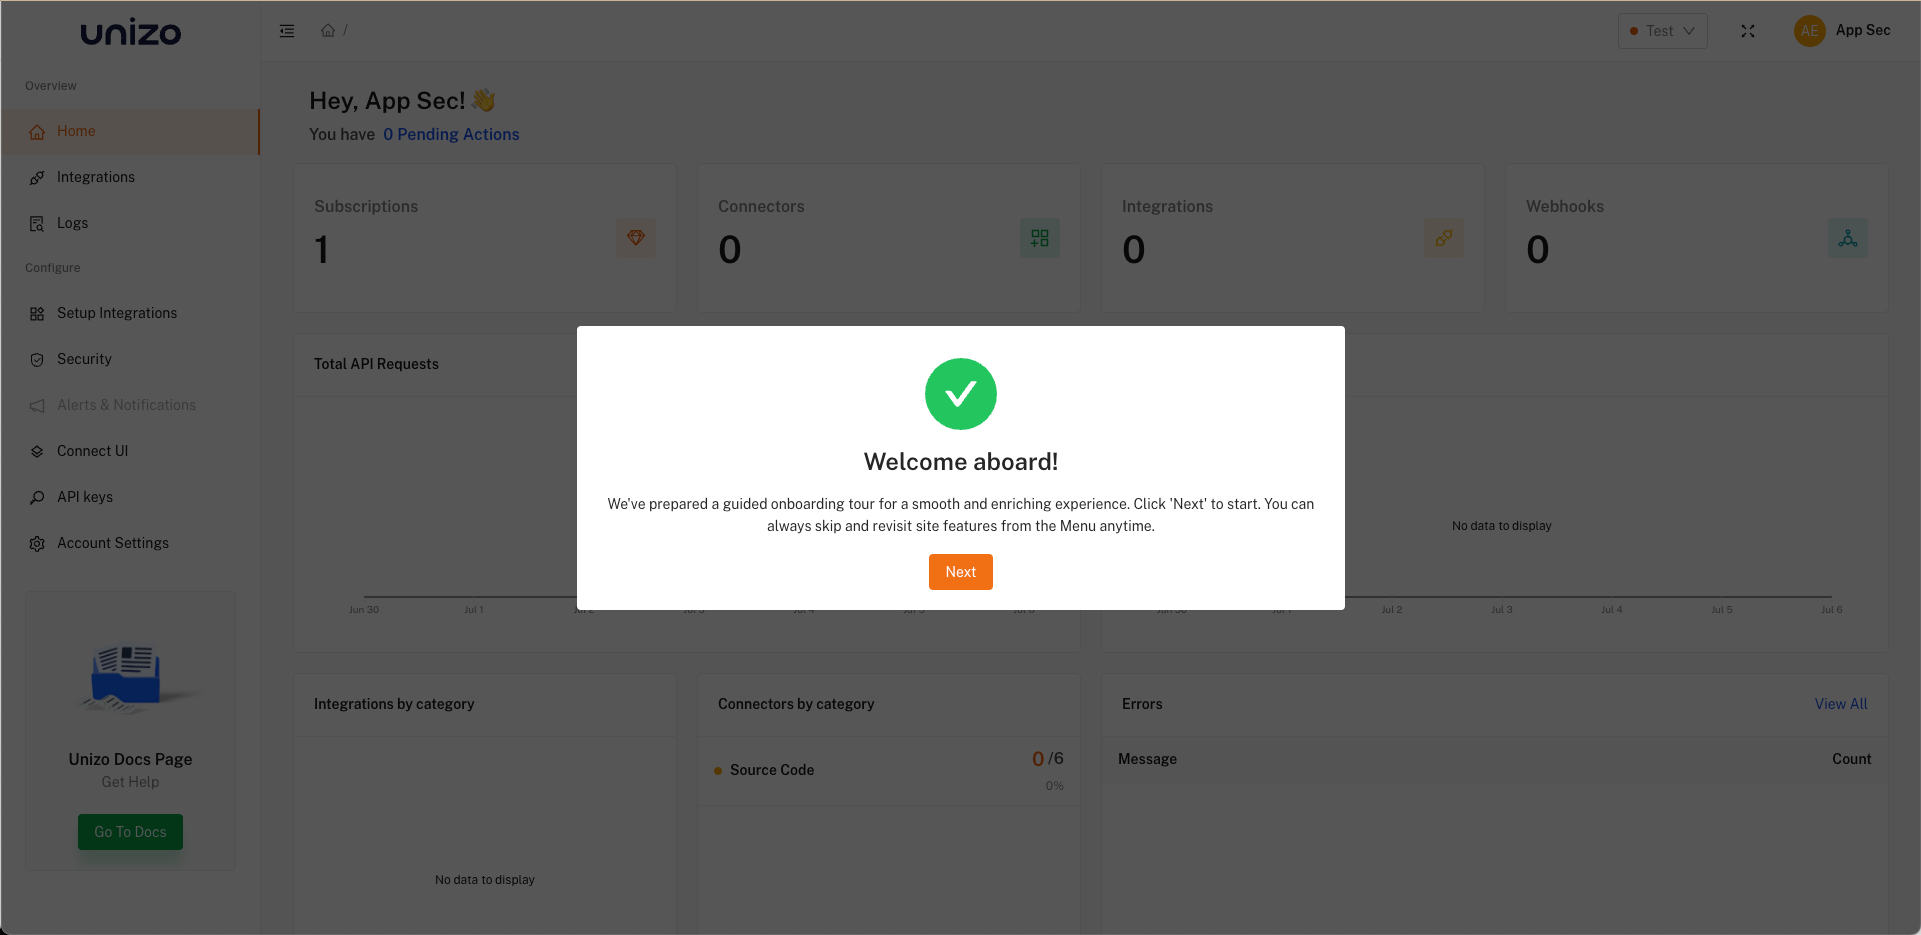
Your Unizo dashboard with guided onboarding tour
Dashboard Features:
- Guided onboarding tour (click "Next" to continue)
- Quick stats: Subscriptions, Connectors, Integrations, Webhooks
- Integration overview by category
- API request monitoring
- Quick access to documentation
Completing Skipped Steps
If you skipped any onboarding steps:
- Look for the "Pending Actions" notification on your dashboard
- Complete individual steps:
- API Keys: Navigate to API Keys in the sidebar
- Connectors: Go to Setup Integrations
- Webhooks: Configure in Setup Integrations → Webhooks
- Team: Manage in Account Settings → Users
For additional support, contact our team at support@unizo.ai.