How to integrate Microsoft Defender account?
Overview
To authenticate with Microsoft Defender (Defender for Endpoint / Defender XDR), you will need to provide the following information from Azure / Microsoft Entra ID:
- Tenant (Directory) ID
- Application (Client) ID
- Client Secret or Certificate (recommended for production)
- API Base URL (Defender Endpoint APIs use
https://api.securitycenter.microsoft.com)
The app must be granted the necessary Application permissions with admin consent for the Defender API.
Step 1: Sign in to Azure Portal
- Go to the Azure Portal
- Sign in with an account that has rights to register applications and grant admin consent (Tenant admin or a role with app management rights)
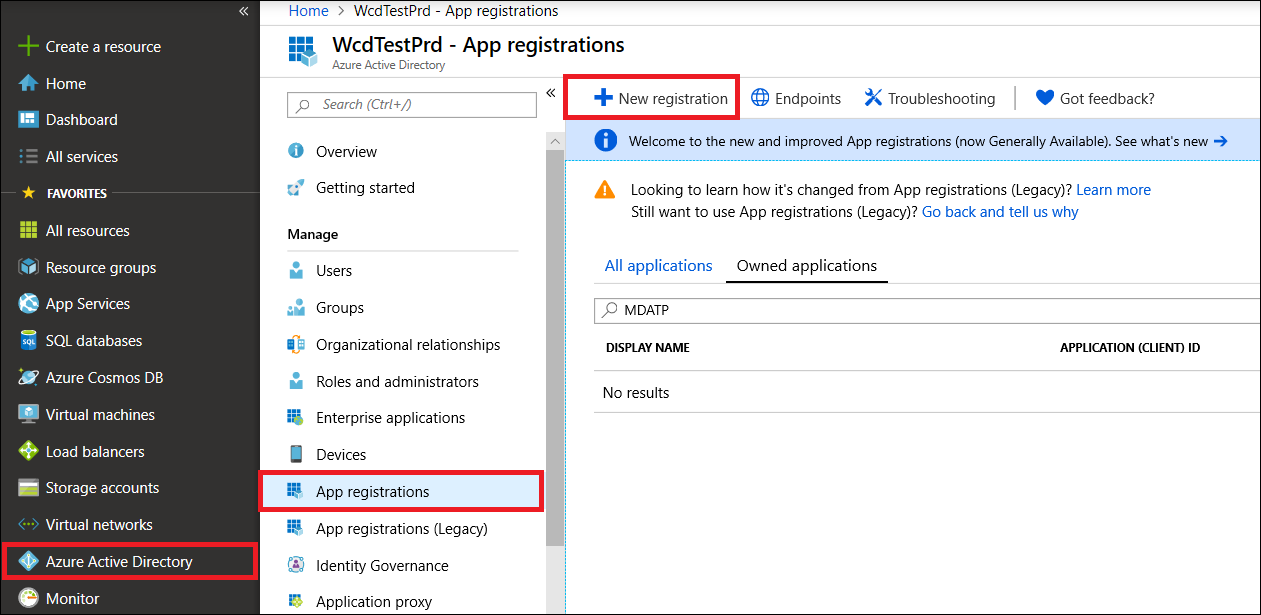
Step 2: Register a New Application
- In the Azure portal, navigate to: Microsoft Entra ID → App registrations → New registration
- Fill in the following details:
- Name: Enter a meaningful name (e.g., "Unizo - Microsoft Defender Connector")
- Supported account types: Select Accounts in this organizational directory only (Single tenant) for internal use
- Redirect URI: Leave blank for service-to-service authentication
- Click Register
Step 3: Add Credentials (Client Secret)
- In your registered app, navigate to: Certificates & secrets
- Under Client secrets, click New client secret
- Add a description and select expiry period
- Click Add
- Copy the secret value immediately - it's shown only once
Important:
- Store the secret securely in a secrets manager or key vault
- For production environments, consider using certificates instead of secrets
Step 4: Configure API Permissions
-
In your app, navigate to: API permissions → Add a permission
-
Select APIs my organization uses
-
Search for and select WindowsDefenderATP (Microsoft Defender for Endpoint)
-
Select Application permissions (not Delegated permissions)
-
Choose the minimum required permissions for your integration:
Essential Permissions for EDR/XDR Integration:
Alert.Read.All- Read all alertsAlert.ReadWrite.All- Read and update alertsMachine.Read.All- Read machine/device inventoryMachine.ReadWrite.All- Read and update machine informationVulnerability.Read.All- Read vulnerability informationAdvancedQuery.Read.All- Run advanced queriesScore.Read.All- Read secure score data
-
Click Add permissions
-
Click Grant admin consent for [Your Tenant] - this requires tenant admin privileges
Note: Without admin consent, application permissions will not be usable
Step 5: Copy Tenant ID, Client ID and Client Secret
From your registered app, collect the following values:
- Tenant ID: Azure AD → Overview → Directory (Tenant) ID
- Client ID: App registration → Overview → Application (Client) ID
- Client Secret: The value you copied in Step 3
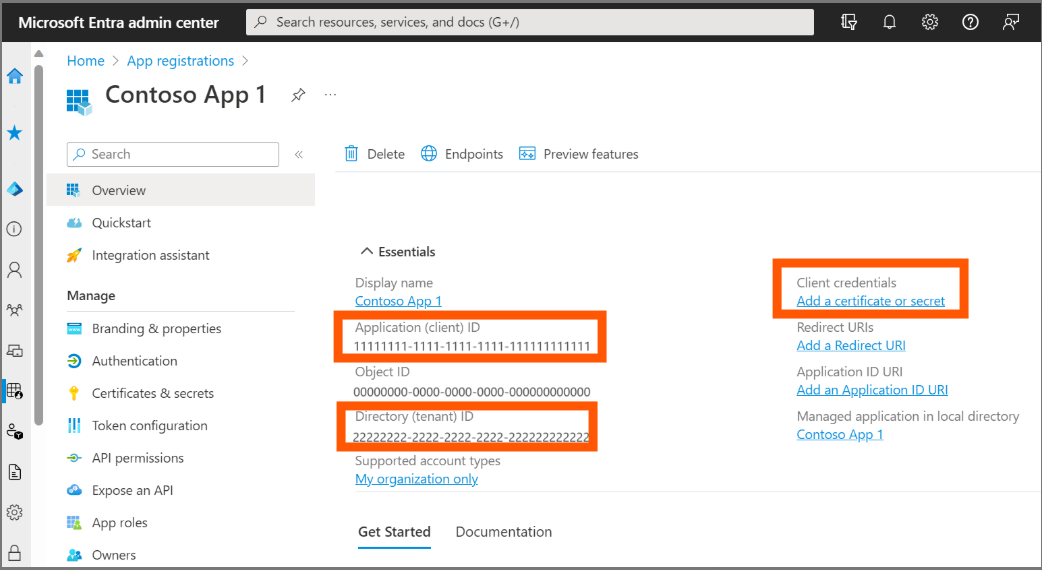
Copy the Application (Client) ID and Directory (Tenant) ID from the Overview page
- API Base URL:
- Global:
https://api.securitycenter.microsoft.com - US Government:
https://api-gcc.securitycenter.microsoft.com - US Government High:
https://api-gcc-high.securitycenter.microsoft.com - For XDR regional endpoints:
- US:
https://us.api.security.microsoft.com - EU:
https://eu.api.security.microsoft.com - UK:
https://uk.api.security.microsoft.com
- US:
- Global: