How to integrate Microsoft Entra ID account?
Overview
To authenticate, you will need to provide the following information:
- Client ID
- Client Secret
- Tenant ID
- Redirect URL
Step 1: Login to Microsoft Entra (Azure AD) Portal
- Go to Microsoft Azure
- Sign in with the Microsoft account that has access to your Entra tenant (typically an admin account).
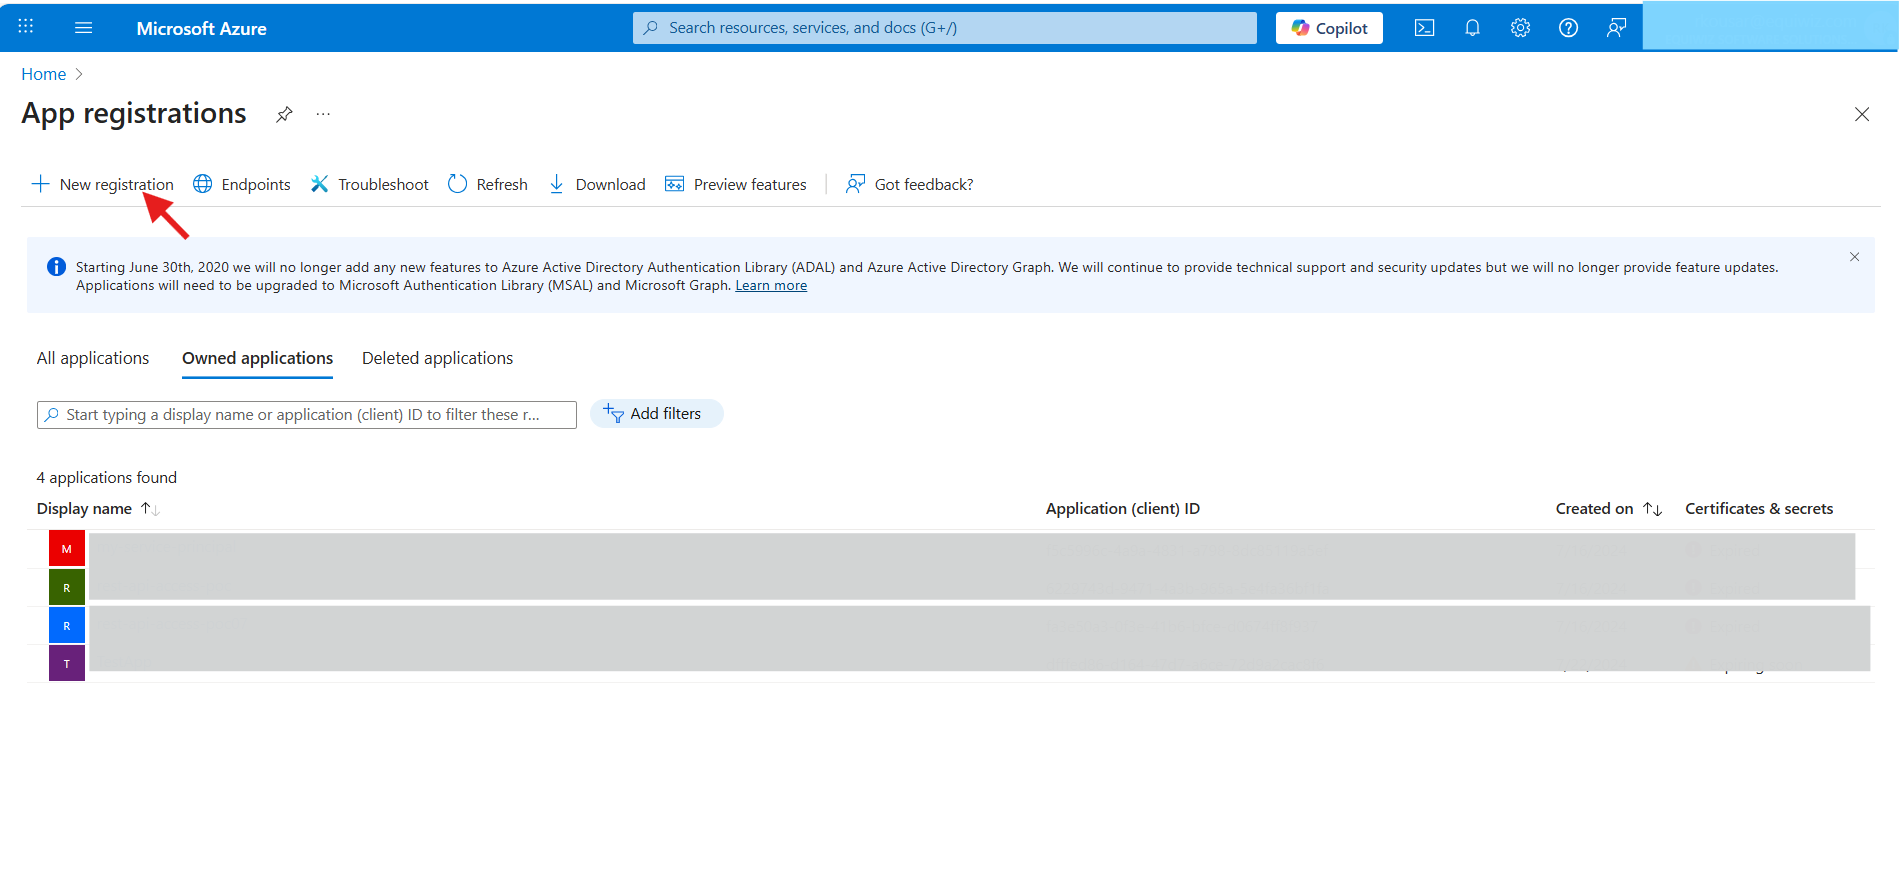
Step 2: Register Your Application
- Once logged in, select "App registrations" from Azure Services.
- Click on "+ New registration".
- Fill the registration details:
- Name: Give your app a name (e.g., Demo App)
- Supported account types: Choose
- Accounts in any organizational directory (Any Microsoft Entra ID tenant - Multitenant)
- Redirect URI: Add your Redirect URL (e.g.,
http://api.unizo.ai/callback/oauthfor Unizo app orhttps://yourapp.unizo.ai/oauth/callbackfor testing)
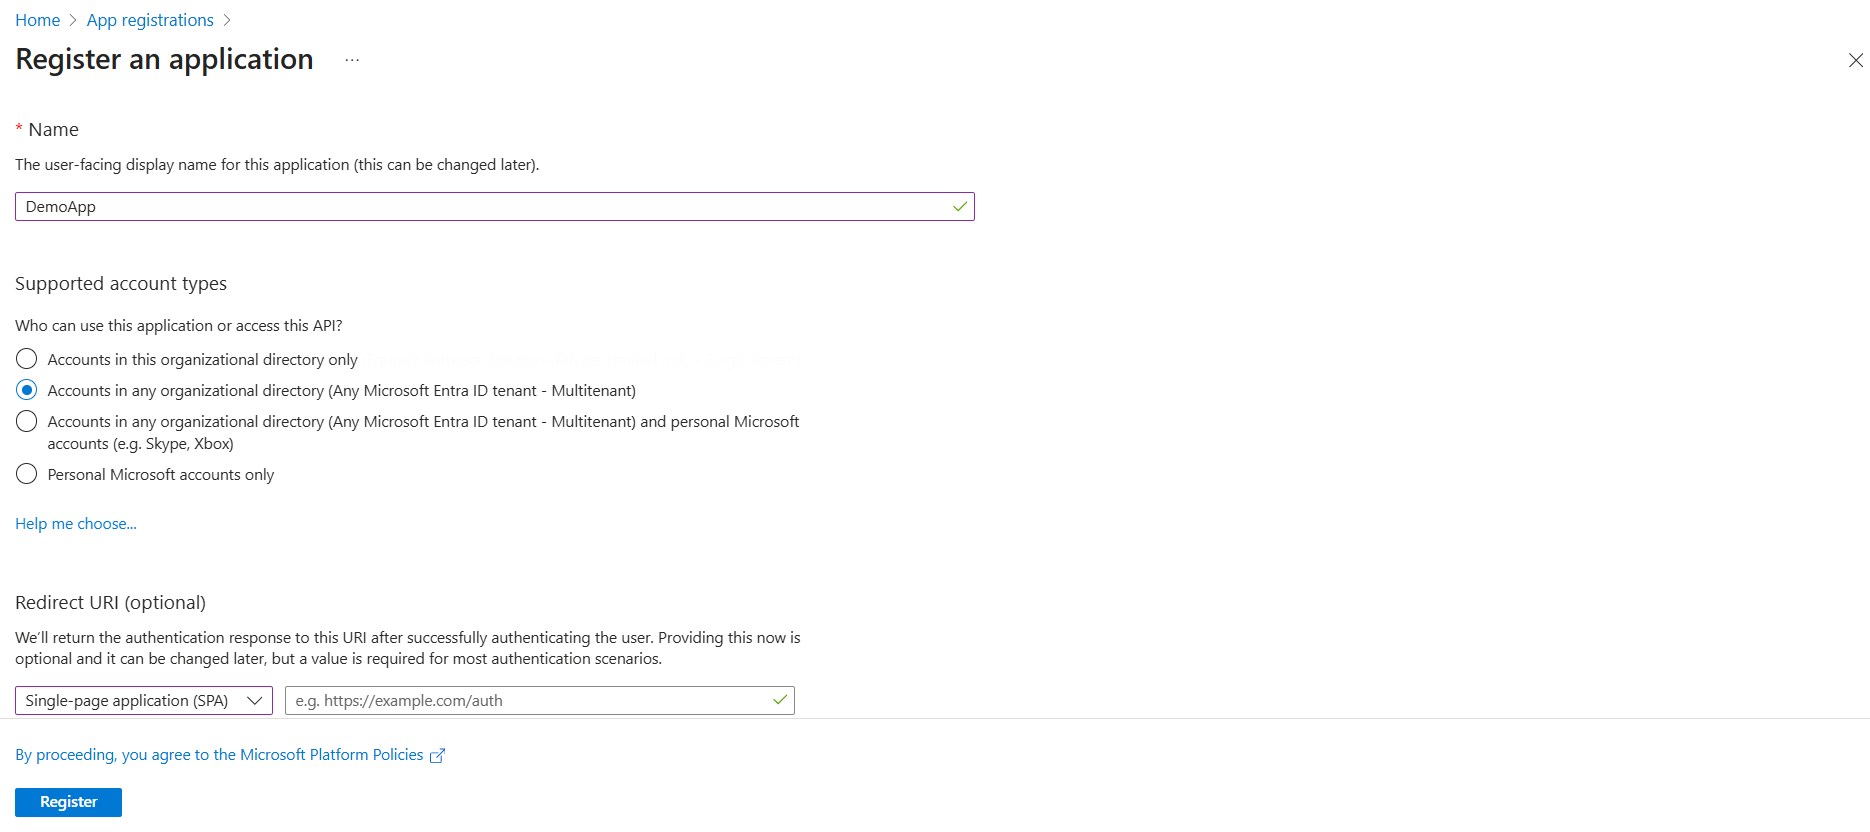
- Click Register.
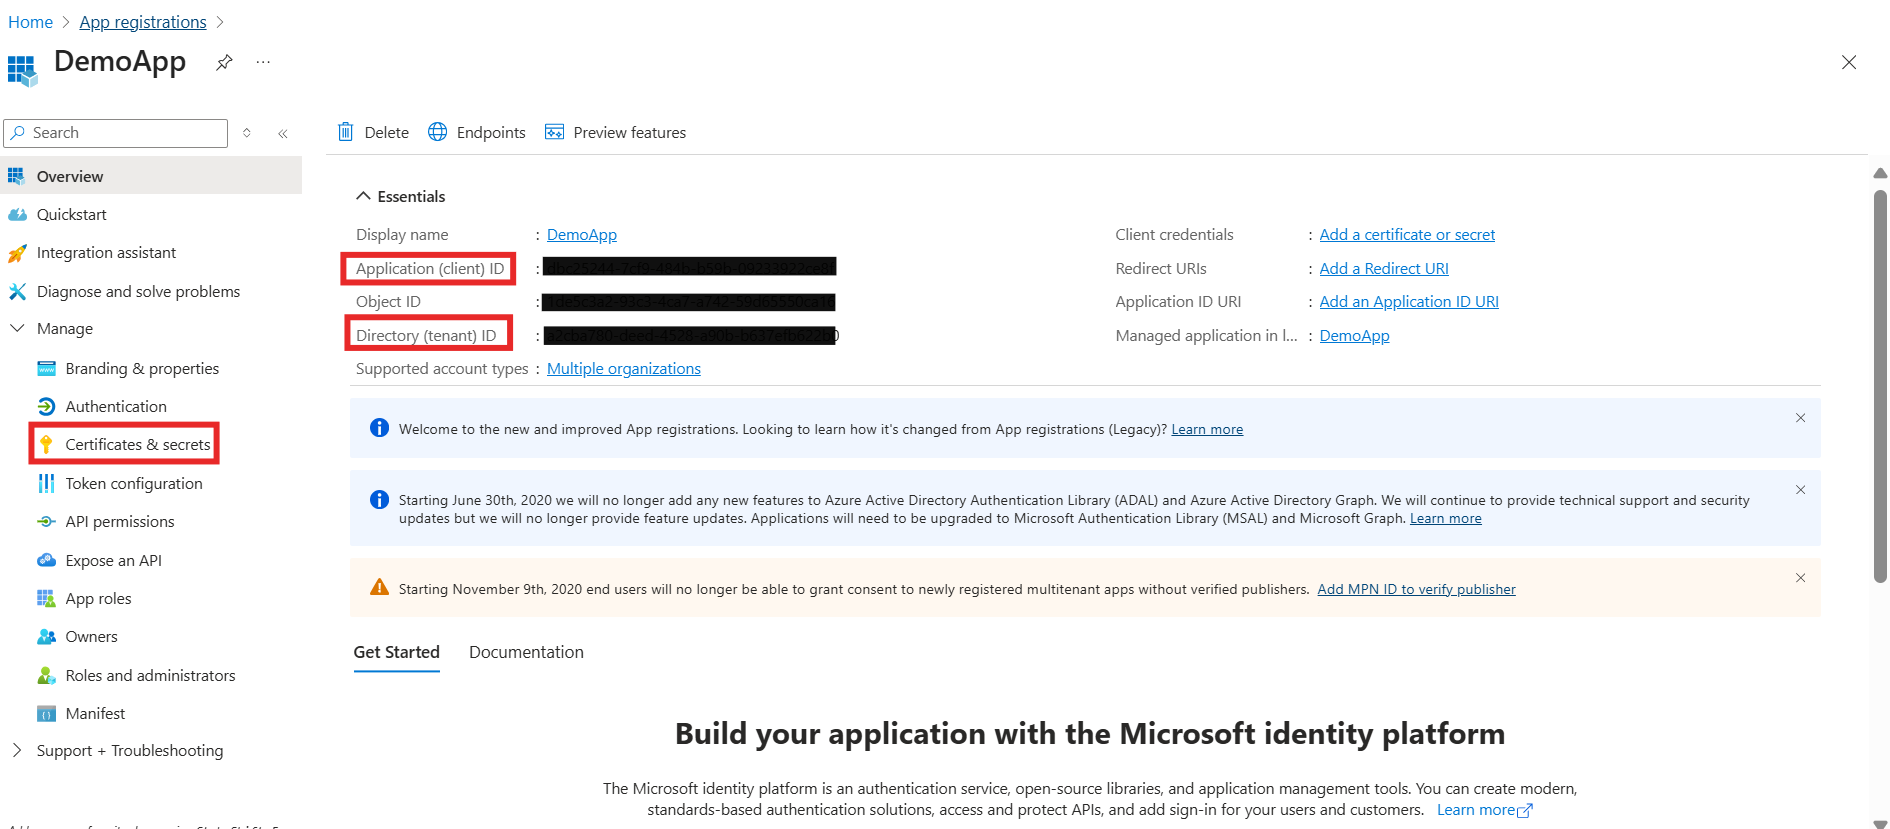
Step 3: Get the Client ID and Tenant ID
-
After the app is registered, you will land on the app overview page.
-
Copy the following:
- Application (client) ID → This is your Client ID
- Directory (tenant) ID → This is your Tenant ID
Step 4: Generate Client Secret
- Go to Certificates & secrets in the left sidebar
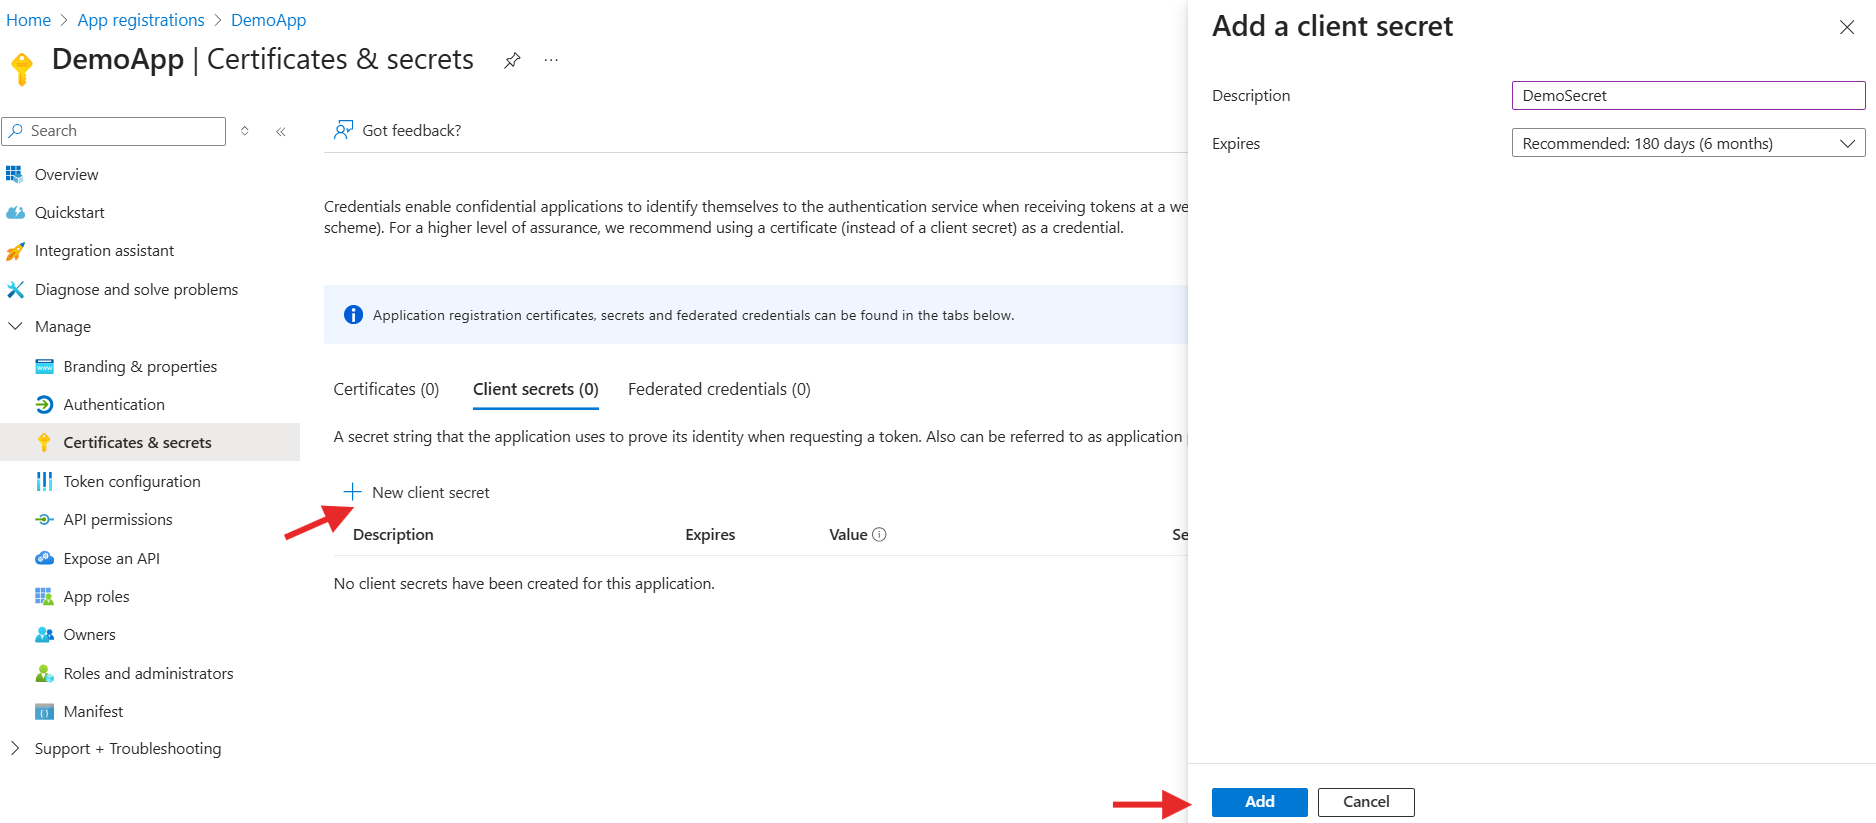
- Under Client secrets, click + New client secret
- Add: - Description: (e.g., App Secret) - Expires: Select an expiration duration (e.g., 6 months or 1 year)
- Click Add
- Copy the Value immediately — this is your Client Secret
Microsoft Graph Permissions → OAuth Flow Mapping
| Permission | Type | Client Credentials (Application) | Authorization Code (Delegated) |
|---|---|---|---|
AuditLog.Read.All | Application / Delegated | ✅ (full tenant audit logs) | ✅ (if user has audit log access) |
Directory.Read.All | Application / Delegated | ✅ (all directory read) | ✅ (limited by user access, may require admin consent) |
Directory.ReadWrite.All | Application / Delegated | ✅ | ✅ (admin consent required) |
Group.Read.All | Application / Delegated | ✅ | ✅ |
Group.ReadWrite.All | Application / Delegated | ✅ | ✅ |
RoleManagement.Read.Directory | Delegated / Application | ✅ | ✅ |
RoleManagement.ReadWrite.Directory | Delegated / Application | ✅ | ✅ |
Policy.Read.All | Delegated / Application | ✅ | ✅ |
Policy.ReadWrite.ConditionalAccess | Delegated / Application | ✅ | ✅ |
User.Read | Delegated | ❌ | ✅ |
User.Read.All | Delegated / Application | ✅ | ✅ (requires admin consent) |
User.ReadWrite.All | Delegated / Application | ✅ | ✅ (requires admin consent) |
UserAuthenticationMethod.Read.All | Application | ✅ | ❌ |
UserAuthenticationMethod.ReadWrite.All | Application | ✅ | ❌ |
How to Add these Permissions
- Go to API Permissions from left navigation
- Click + Add a permission

- Select:
- Microsoft Graph
- Choose:
- Application permissions for background apps
- Delegated permissions for signed apps
- Add the required permissions listed above and click Add permissions
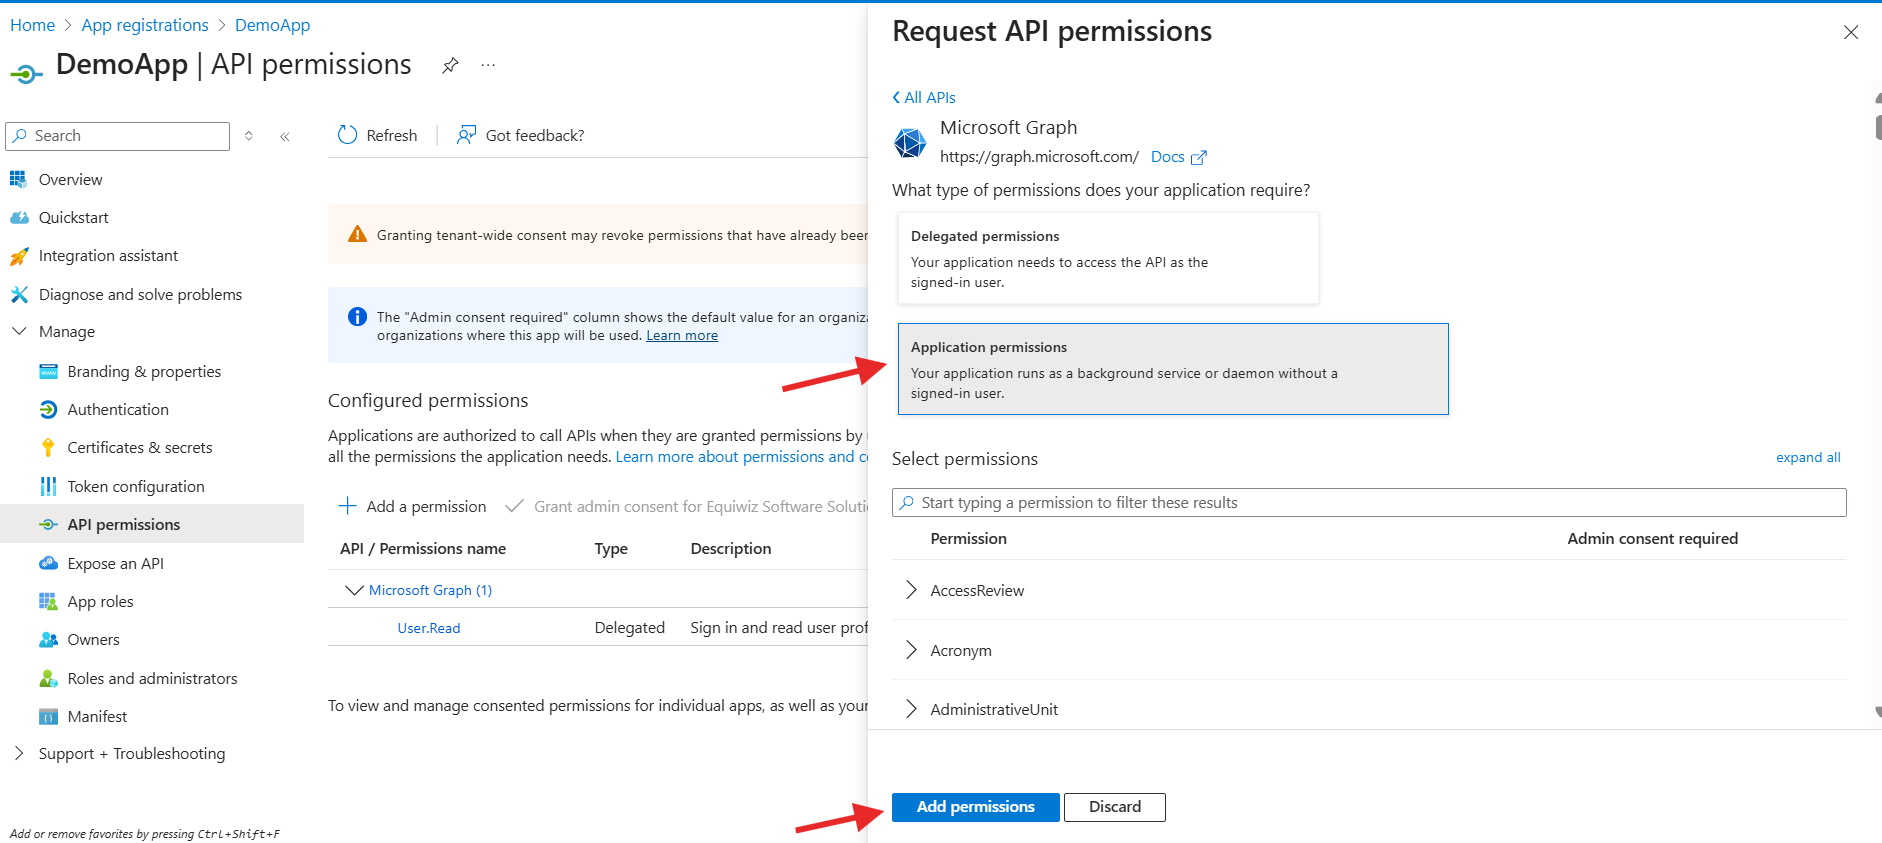
- Click Grant admin consent